Step 1: Log into your account
In your browser navigate to www.mailchimp.com. Log into your account.
Step 2: Go to the Lists menu
From your Dashboard, navigate to the Lists menu on the top of the page.

Step 3: Click on the List you wish to work with

Step 4: Click on “Signup Forms” in the menu bar below your list name

Step 5: Click on “General Forms”

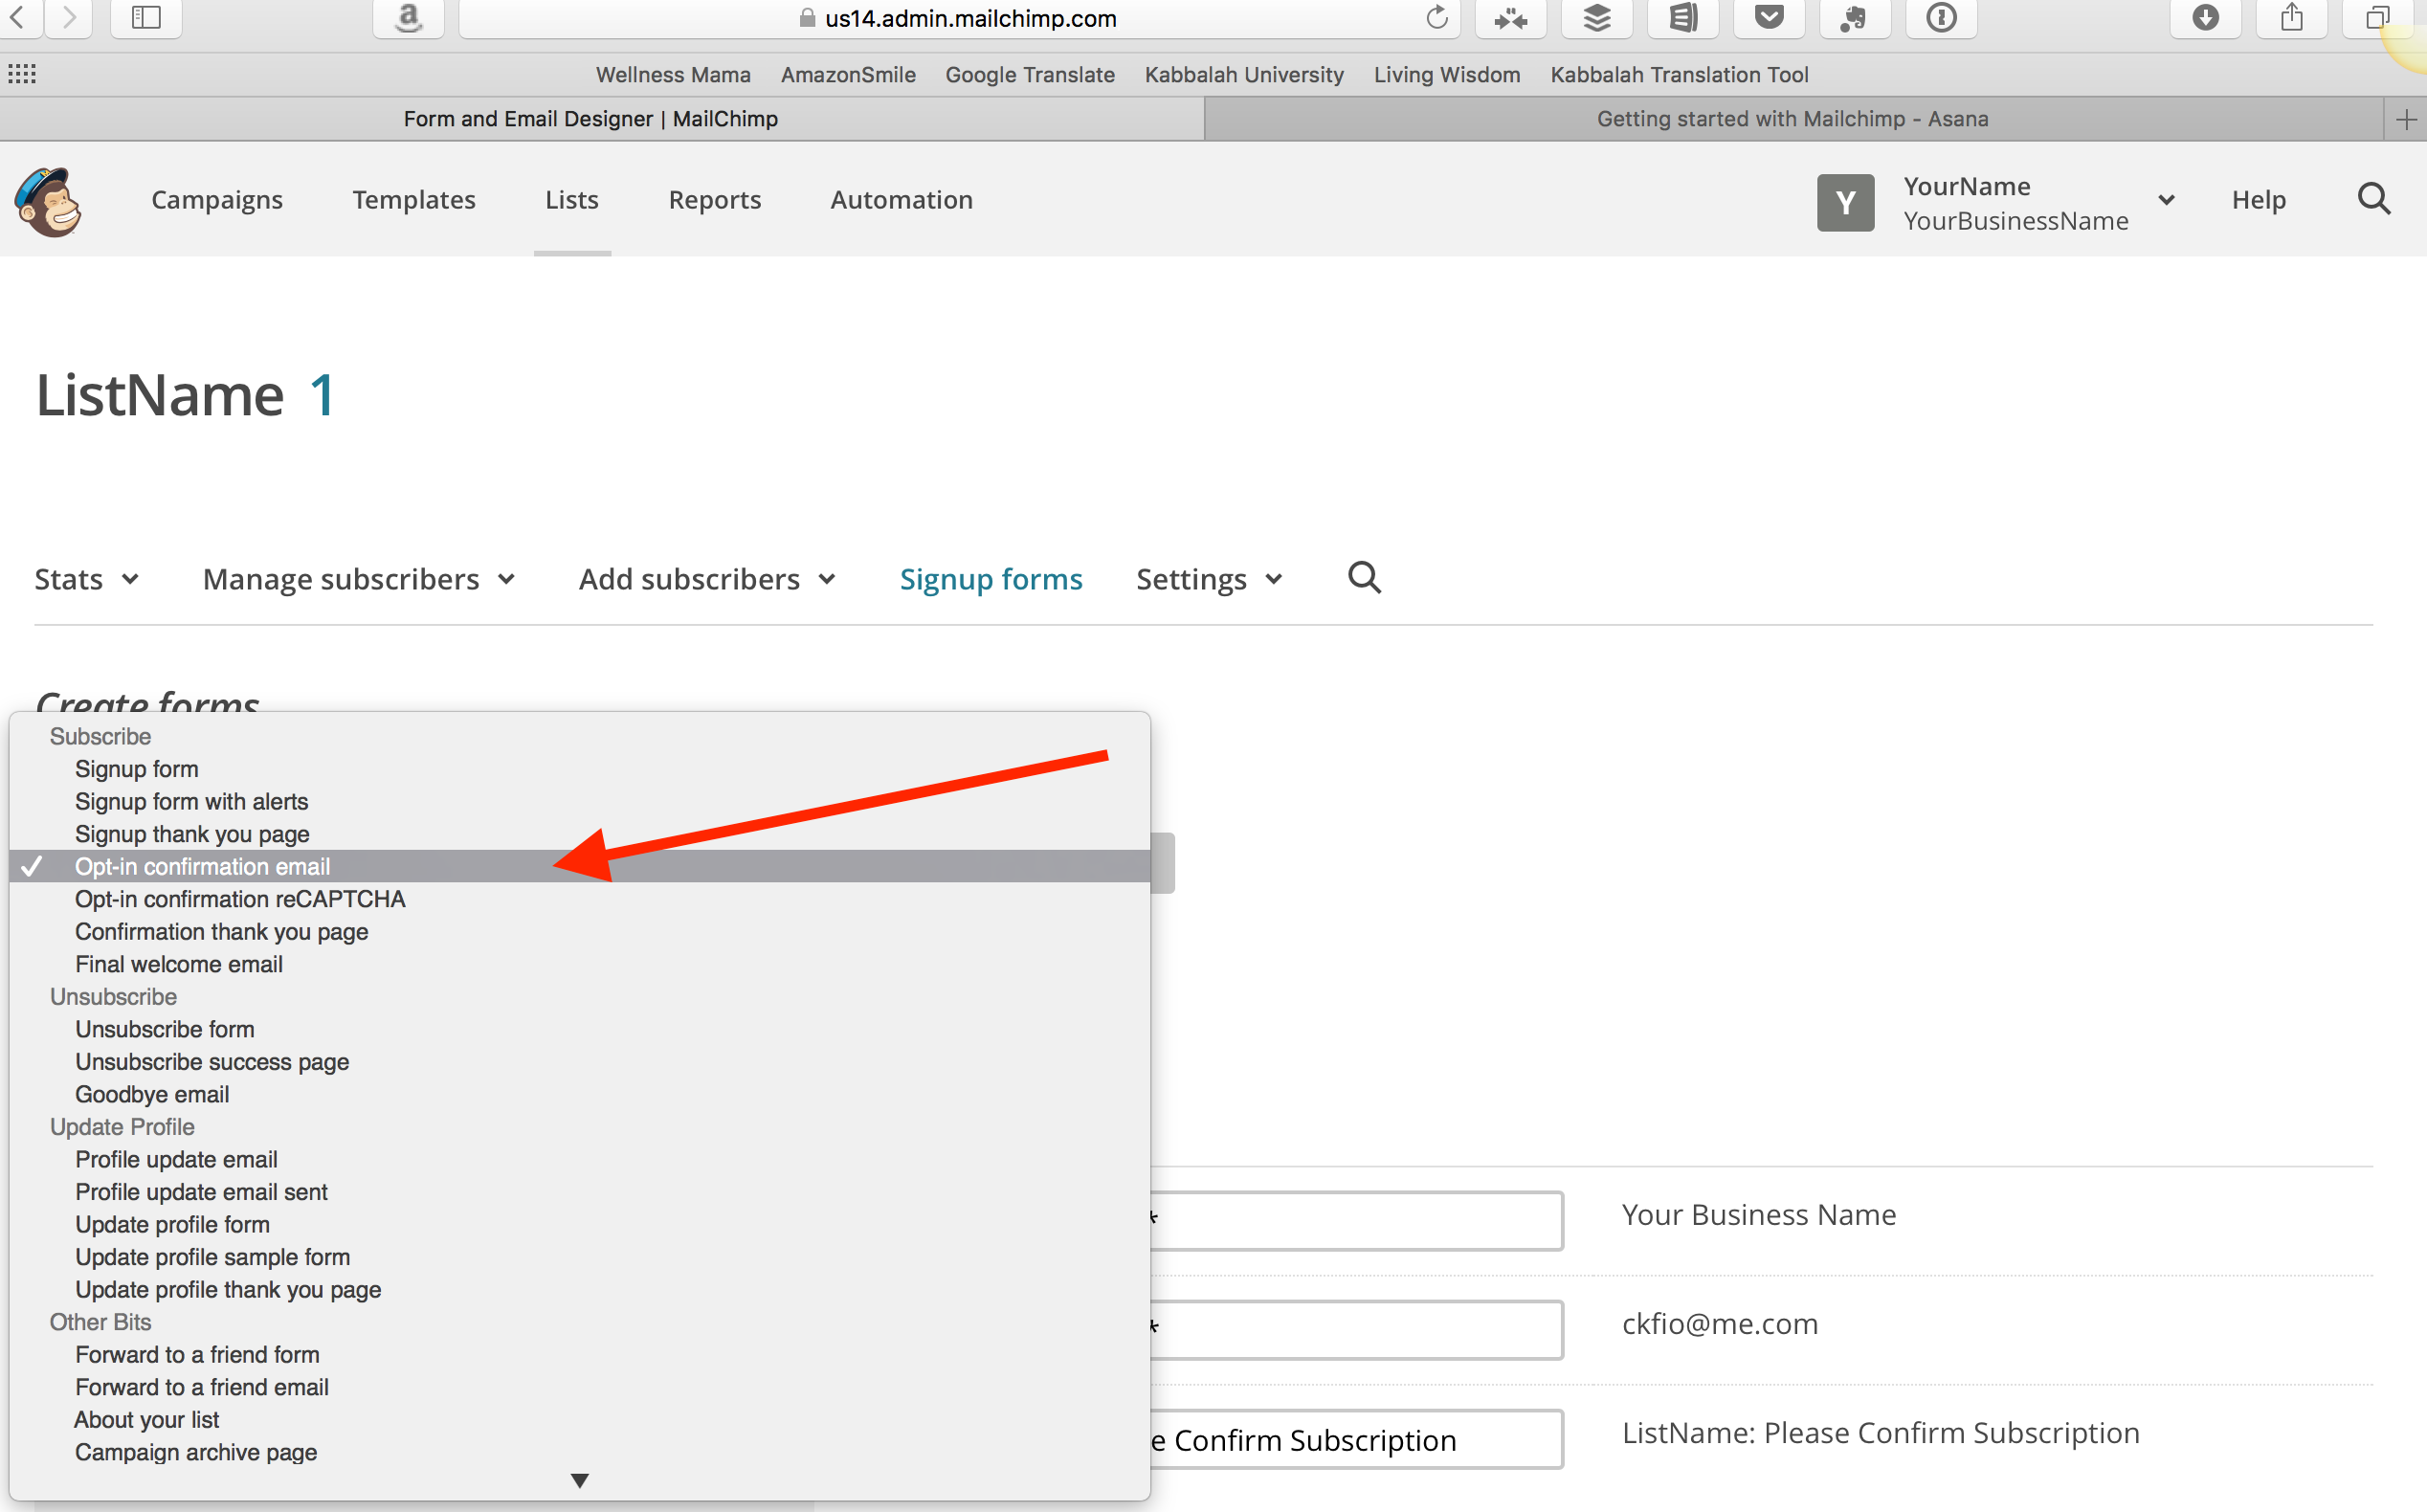
Step 6: Click on the scroll down Menu

Step 7: Select the form you wish to customise.
In this case, we will be working with the Opt-in Confirmation form.
Step 8: Changes will be automatically saved as they are made.
To customise the sign-up form you will follow steps 1 through 7 and select Signup Form

MailChimp enables people interested in your work or products to subscribe and unsubscribe to email marketing lists through sign-up forms, which are typically placed on your website’s sidebar.
First, build the form as needed. Next, design its body, and finally, share it. You can share your forms in 3 different ways:
- MailChimp assigns the form its own URL to make it easy to share on Social Media.
- An HTML link is also provided for use within documents.
- The final option allows for the creation of an HTML code to create a small subscribe form that can be placed in a sidebar on your site.