One of the important features of your website are the navigation menus. Found in convenient, useful and strategic places around your site, menus help your visitors easily discover your content.
From time to time you may want to make changes to your menu, such as…
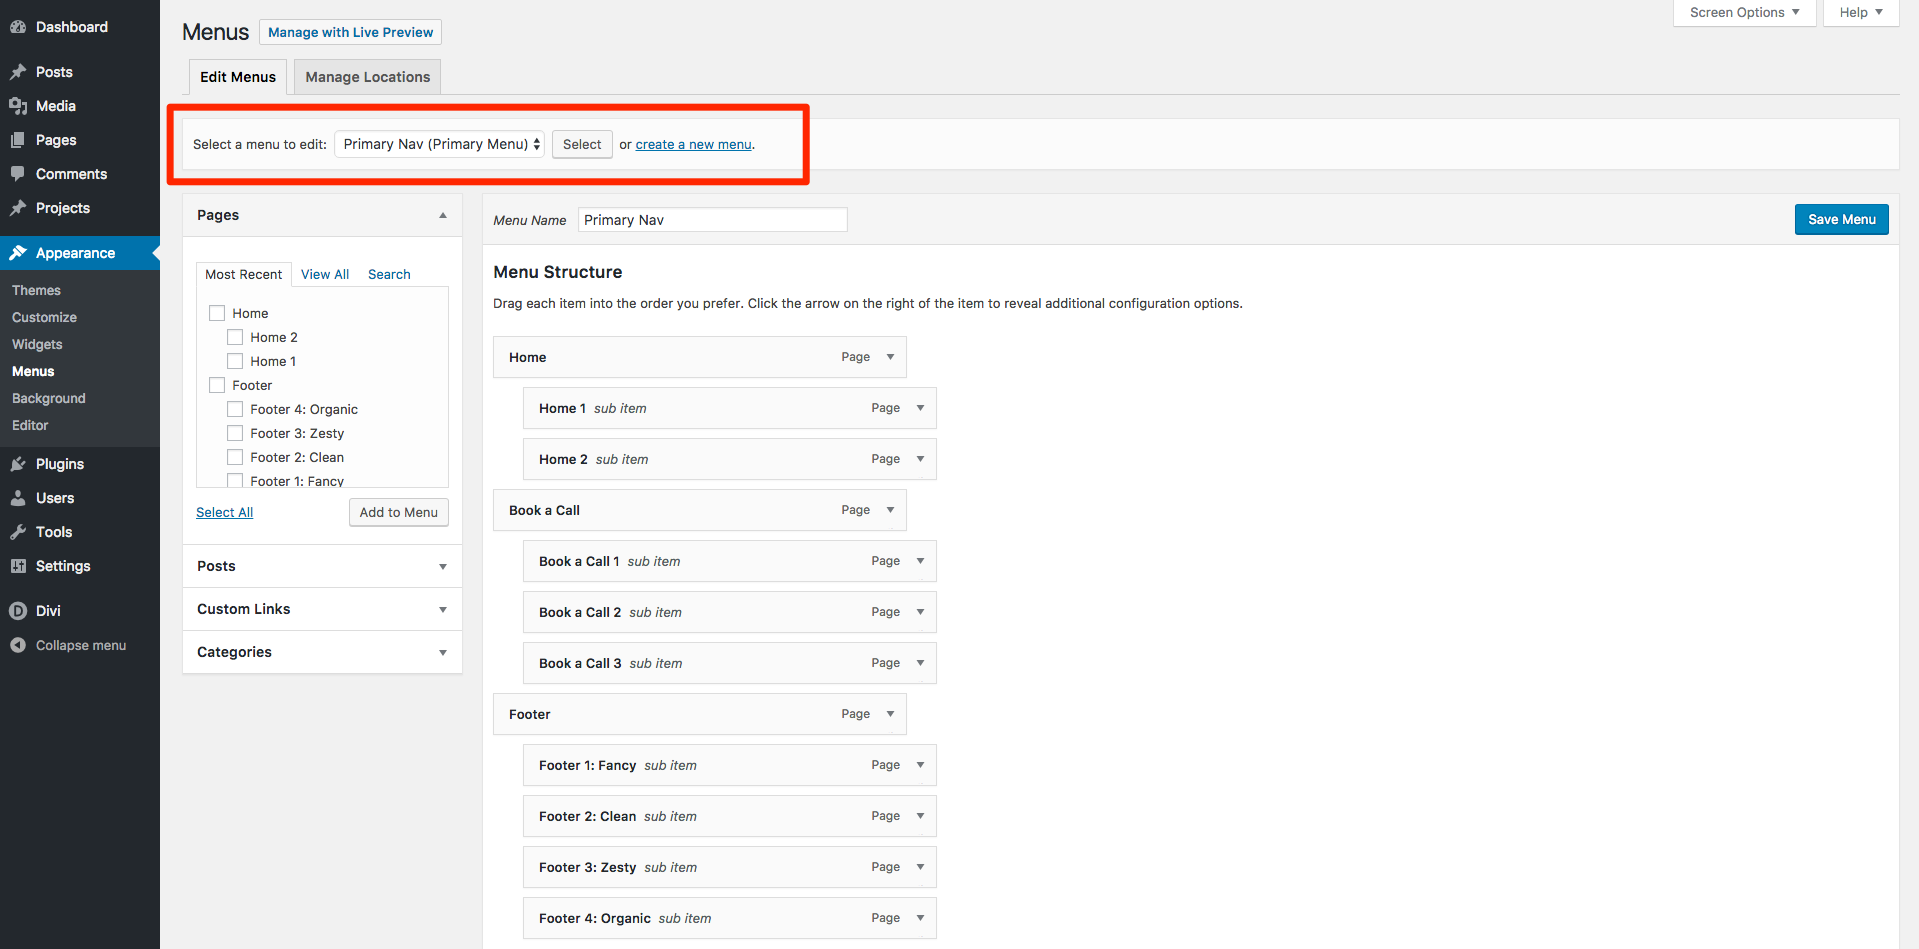
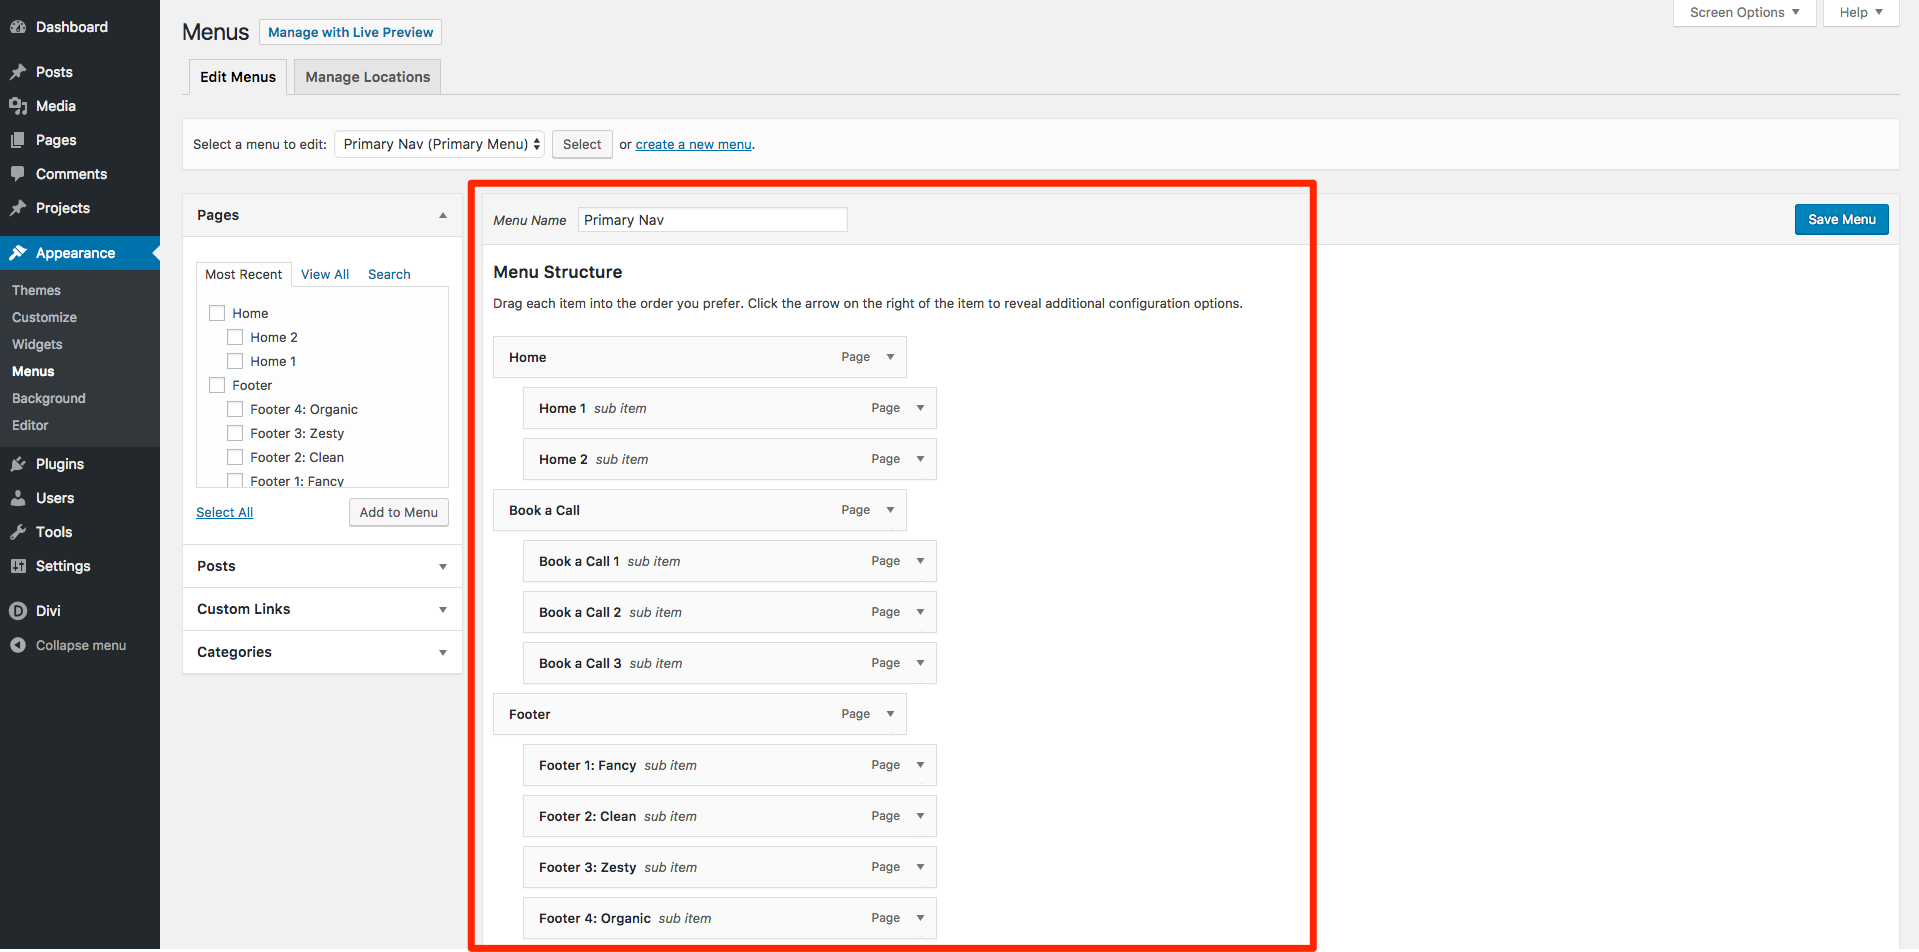
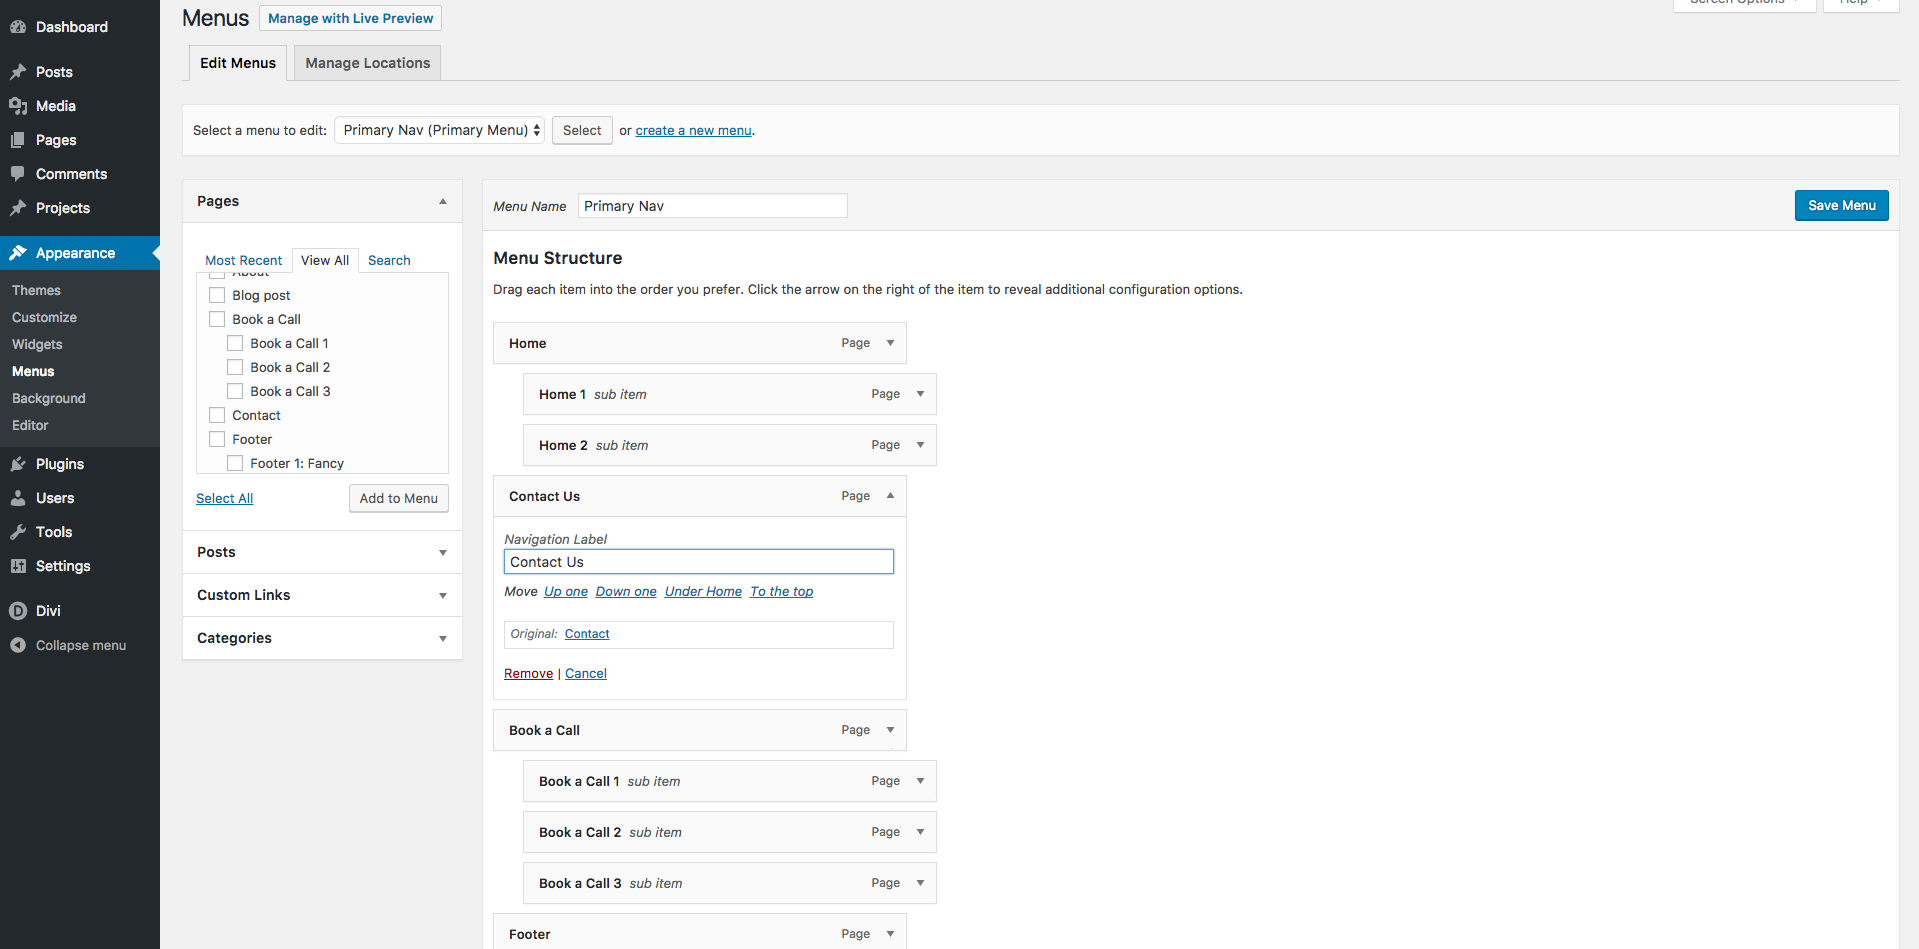
 The ‘Menus’ page is where we will be making all of the changes. It may look quite complicated but it is actually quite straightforward. The page is split in to three distinct parts…
Top Part: The Menu Selector
Here you can select which menu you would like to make changes to. Your website allows you to create several menus and place them in different sections of your site. Most websites will only have one or two menus – on at the top of the site and one at the bottom.
The ‘Menus’ page is where we will be making all of the changes. It may look quite complicated but it is actually quite straightforward. The page is split in to three distinct parts…
Top Part: The Menu Selector
Here you can select which menu you would like to make changes to. Your website allows you to create several menus and place them in different sections of your site. Most websites will only have one or two menus – on at the top of the site and one at the bottom.
 Left Part: Your Website Pages & Posts
The left part of the page gives you a handy list of the pages, posts and blog categories in your site. This area makes it really easy to find a page and add it to your menu.
Left Part: Your Website Pages & Posts
The left part of the page gives you a handy list of the pages, posts and blog categories in your site. This area makes it really easy to find a page and add it to your menu.
 Right Part: Your Current Menu
Over on the right of the page is a visual guide to your current selected menu, displayed in a simple list. Items at the top of the list will appear to the left of your menu (or at the top of your menu if you have a vertical navigation). Items in the list that are below another menu item and indented mean that they will be hidden under that item until your visitor hovers over them, whereby they will then be shown in a dropdown menu.
Right Part: Your Current Menu
Over on the right of the page is a visual guide to your current selected menu, displayed in a simple list. Items at the top of the list will appear to the left of your menu (or at the top of your menu if you have a vertical navigation). Items in the list that are below another menu item and indented mean that they will be hidden under that item until your visitor hovers over them, whereby they will then be shown in a dropdown menu.
 Now we know our way around this page we’re ready to begin making some changes to our menus.
 When you find the page or post you’d like to add to you menu just click the box next to it and then click the ‘Add to Menu’ button.
 If you like you can tick multiple posts or pages to add them at the same time.
 Unlike posts, pages and categories where we can simply select the pages we want to add, for custom links we need to actually include the full link to the page. Type or paste your link in the ‘URL’ box – be sure to delete the ‘http://’ that is already in the box if your link has it already. You want to avoid your link looking like this: https://https://www.mywebsite.come/. Any of the following should be acceptable:
 Next we need to give our link a label and we can do this in the ‘Link Text’ box. This is a way to make the link look neater and more friendly in your menu. For this example I don’t want the full link to be displayed in my menu, I’d much prefer the link to say ‘Awesome Website’ instead. So I’ll go ahead and type that in to the ‘Link Text’ box…
 Finally, I’ll add this to my menu by clicking the ‘Add to Menu’ button.
 Note: Deleting an item from your menu does not delete the page/post itself.

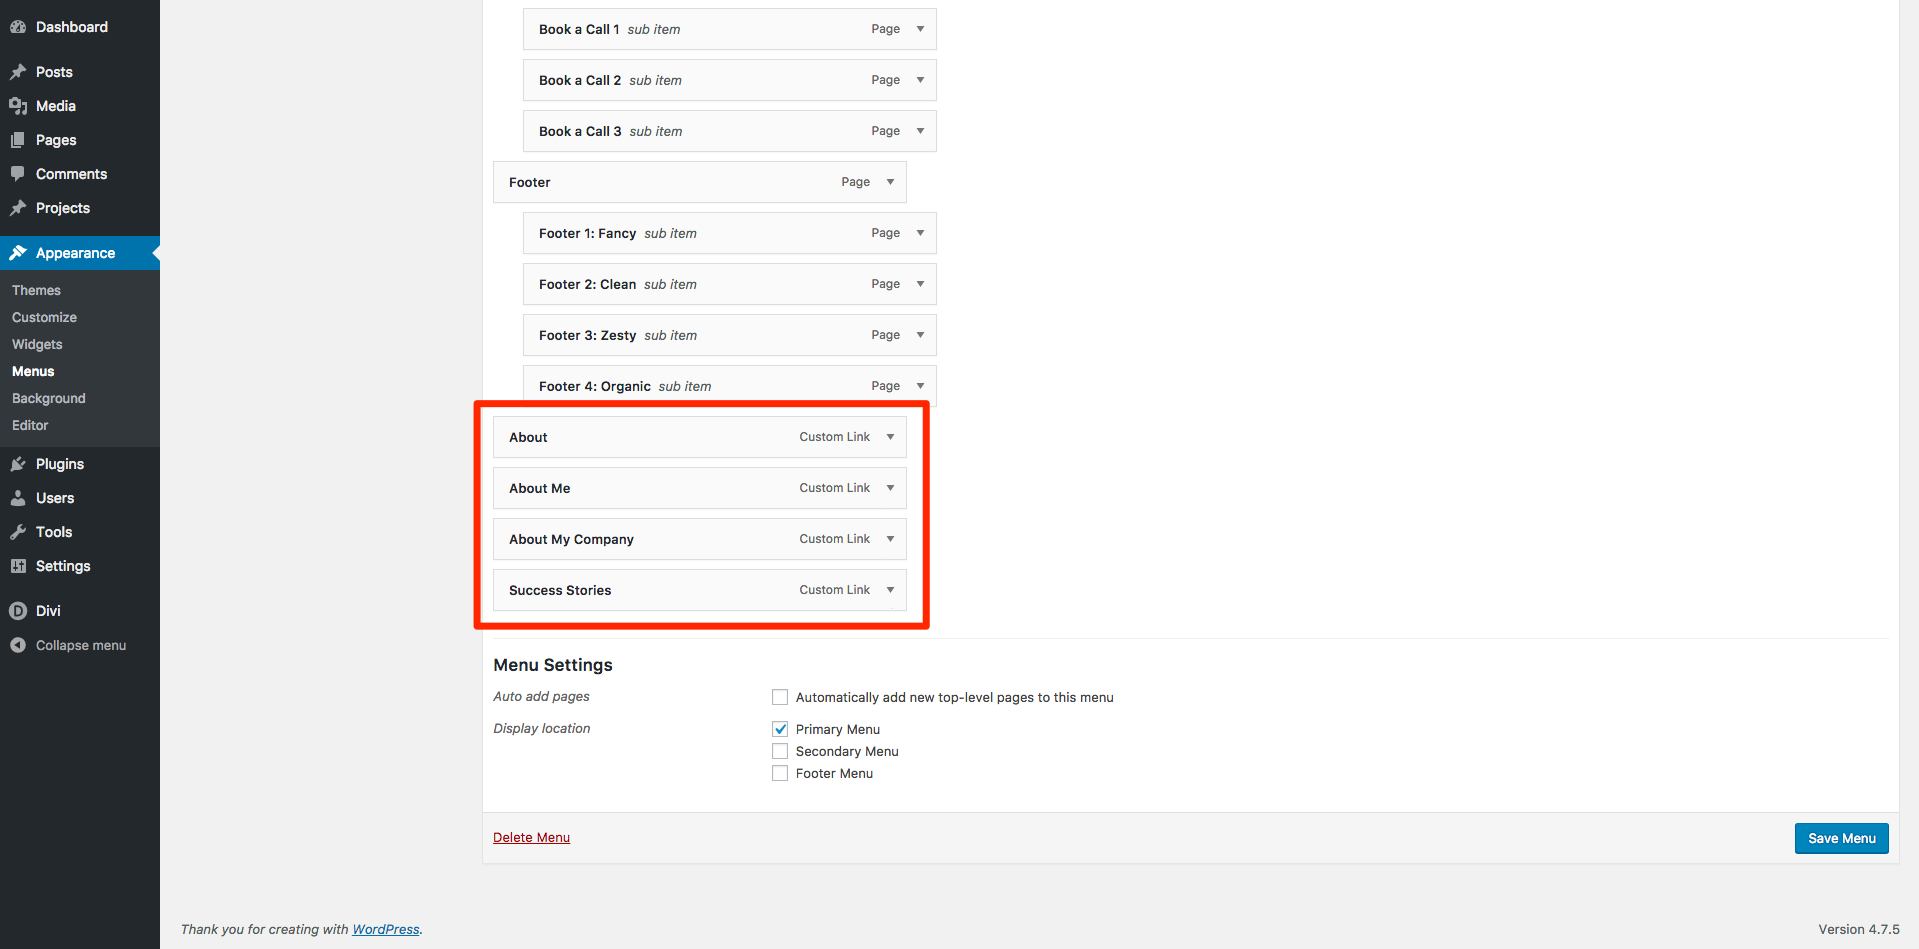 Notice that all of the menu items I have added are all lined up the same. This means that they will each appear next to each other in our menu, like this…
 We want the last three pages to be displayed in a drop down menu under ‘About’ – we call this ‘nesting’. To do this we need to indent the three pages so that they will be ‘nested’ under the ‘About’ menu item.
 Now, when you view your website you will see that we have the main menu item, and the other items which we nested below it are now displayed in a drop down menu when we hover over.
 Note: Ensure that wherever you put your menu item that it does not indent, otherwise it will still be in a dropdown menu.
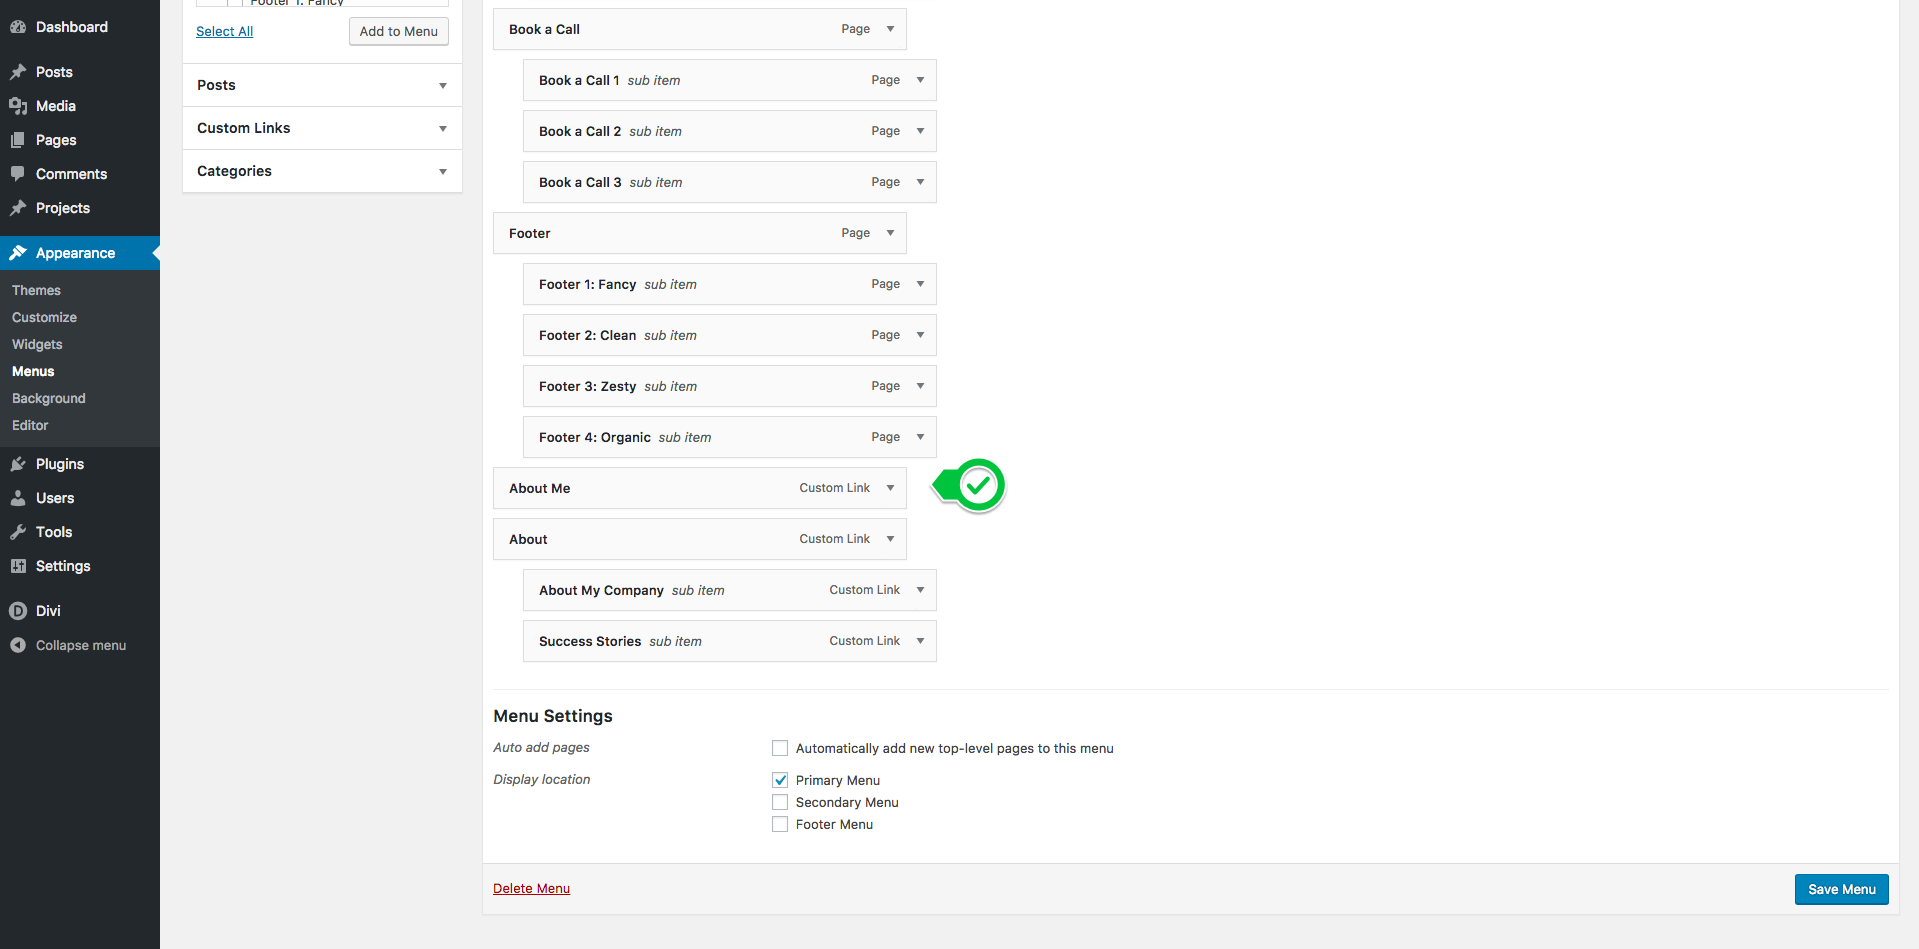
In this example the menu item we removed has no indent and will display as it’s own link in our menu:
Note: Ensure that wherever you put your menu item that it does not indent, otherwise it will still be in a dropdown menu.
In this example the menu item we removed has no indent and will display as it’s own link in our menu:
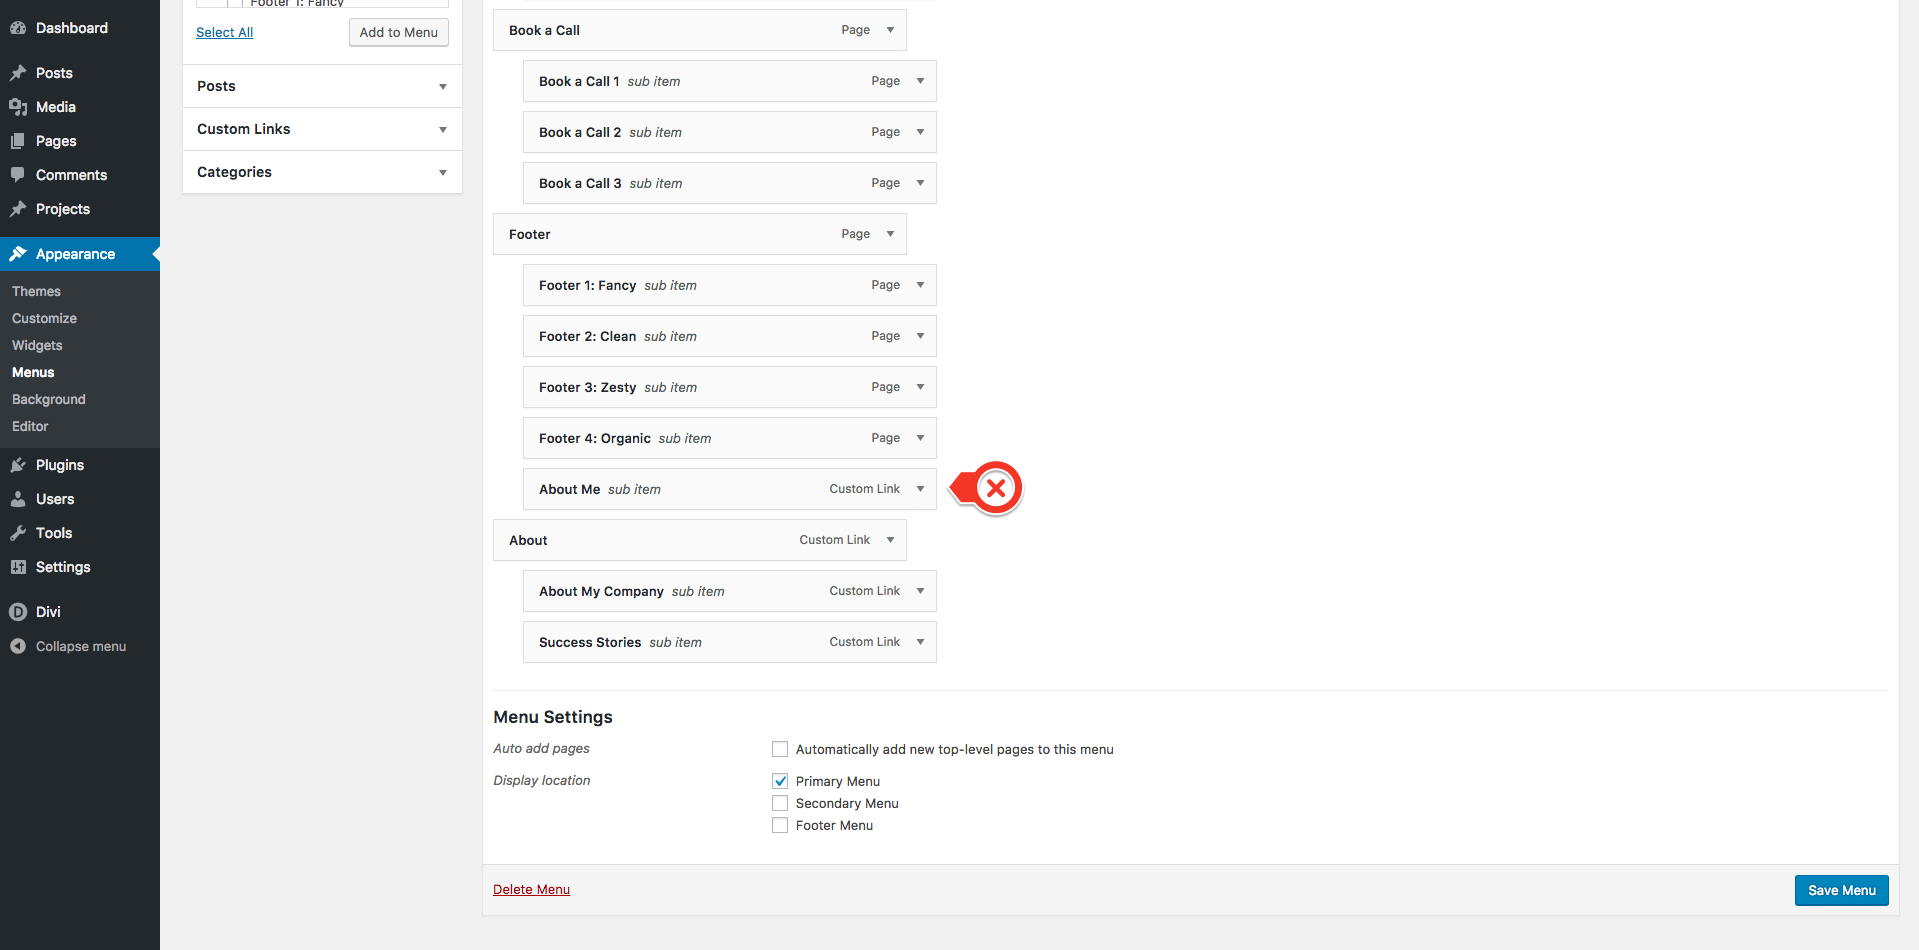
 However, in this example I have accidentally nested the menu item inside another drop down menu:
- Adding a new menu item (like a link to a new page or area of your site),
- Removing a menu item (like a product or service you no longer offer),
- Or simply renaming menu items so that they are more accessible or on-brand.
Step 1: Login to your WordPress dashboard.
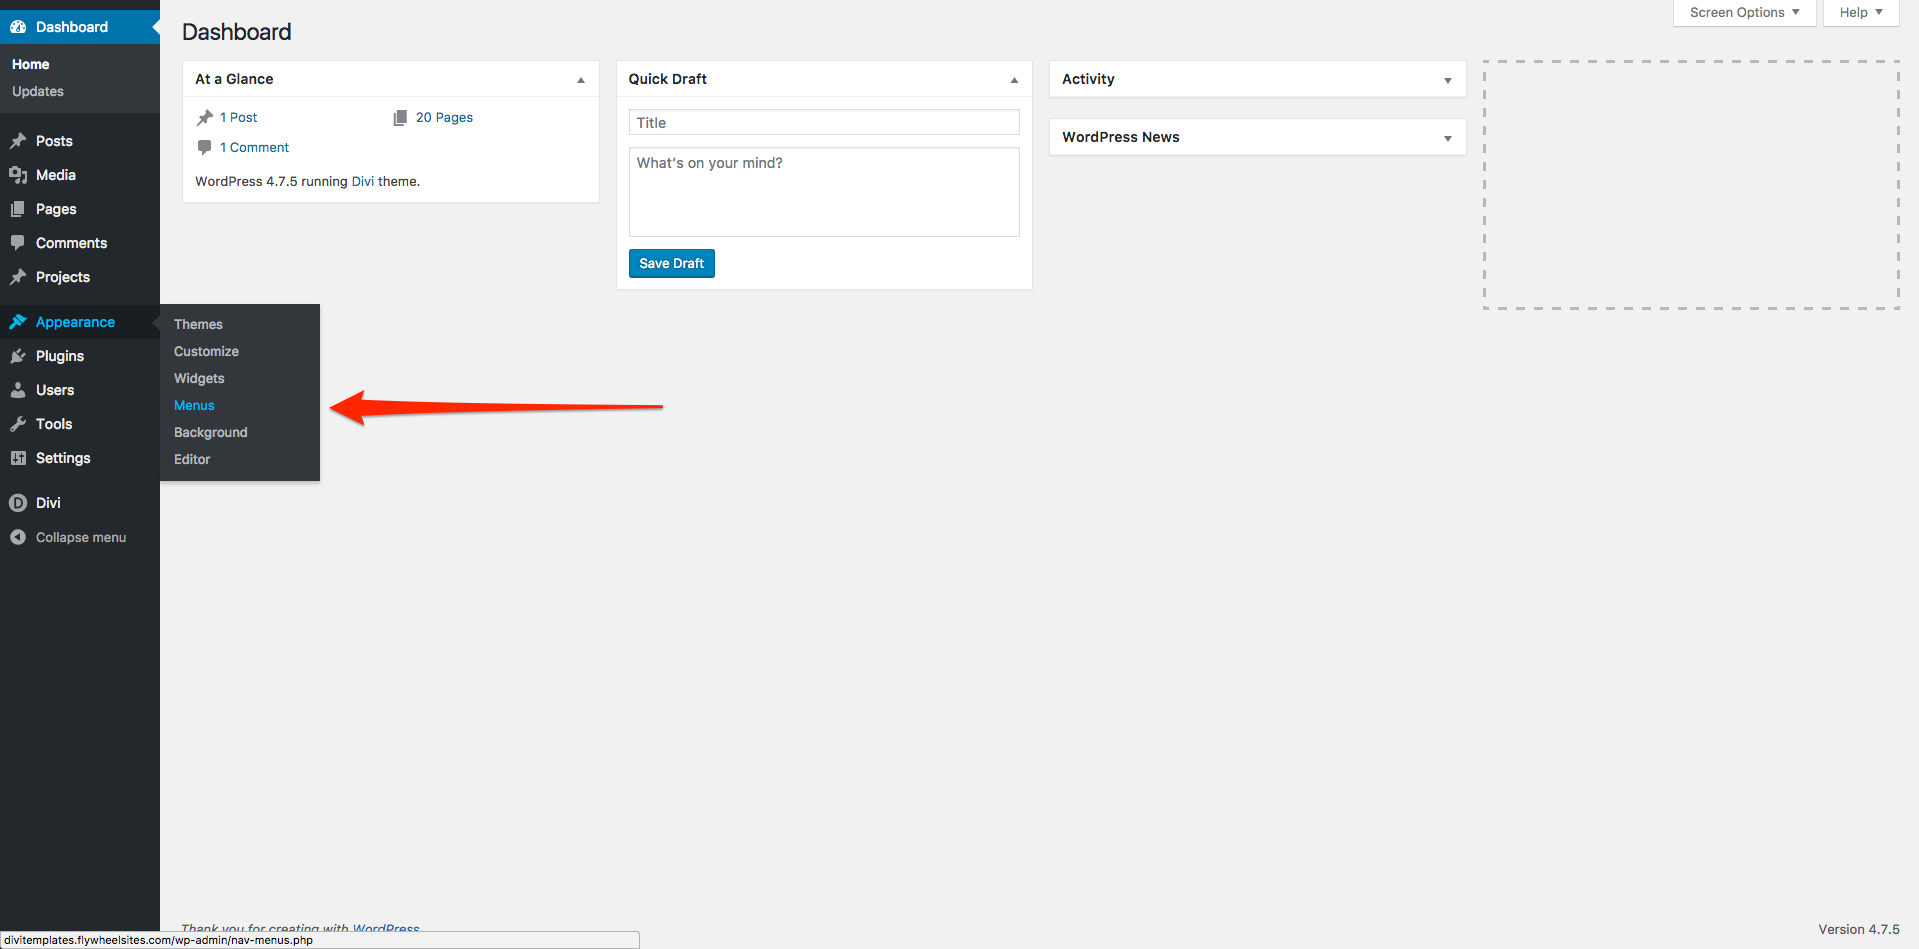
Step 2: In the left side panel hover over ‘Appearance’ and then click on ‘Menus’.
The ‘Menus’ page is where we will be making all of the changes. It may look quite complicated but it is actually quite straightforward. The page is split in to three distinct parts…
Top Part: The Menu Selector
Here you can select which menu you would like to make changes to. Your website allows you to create several menus and place them in different sections of your site. Most websites will only have one or two menus – on at the top of the site and one at the bottom.
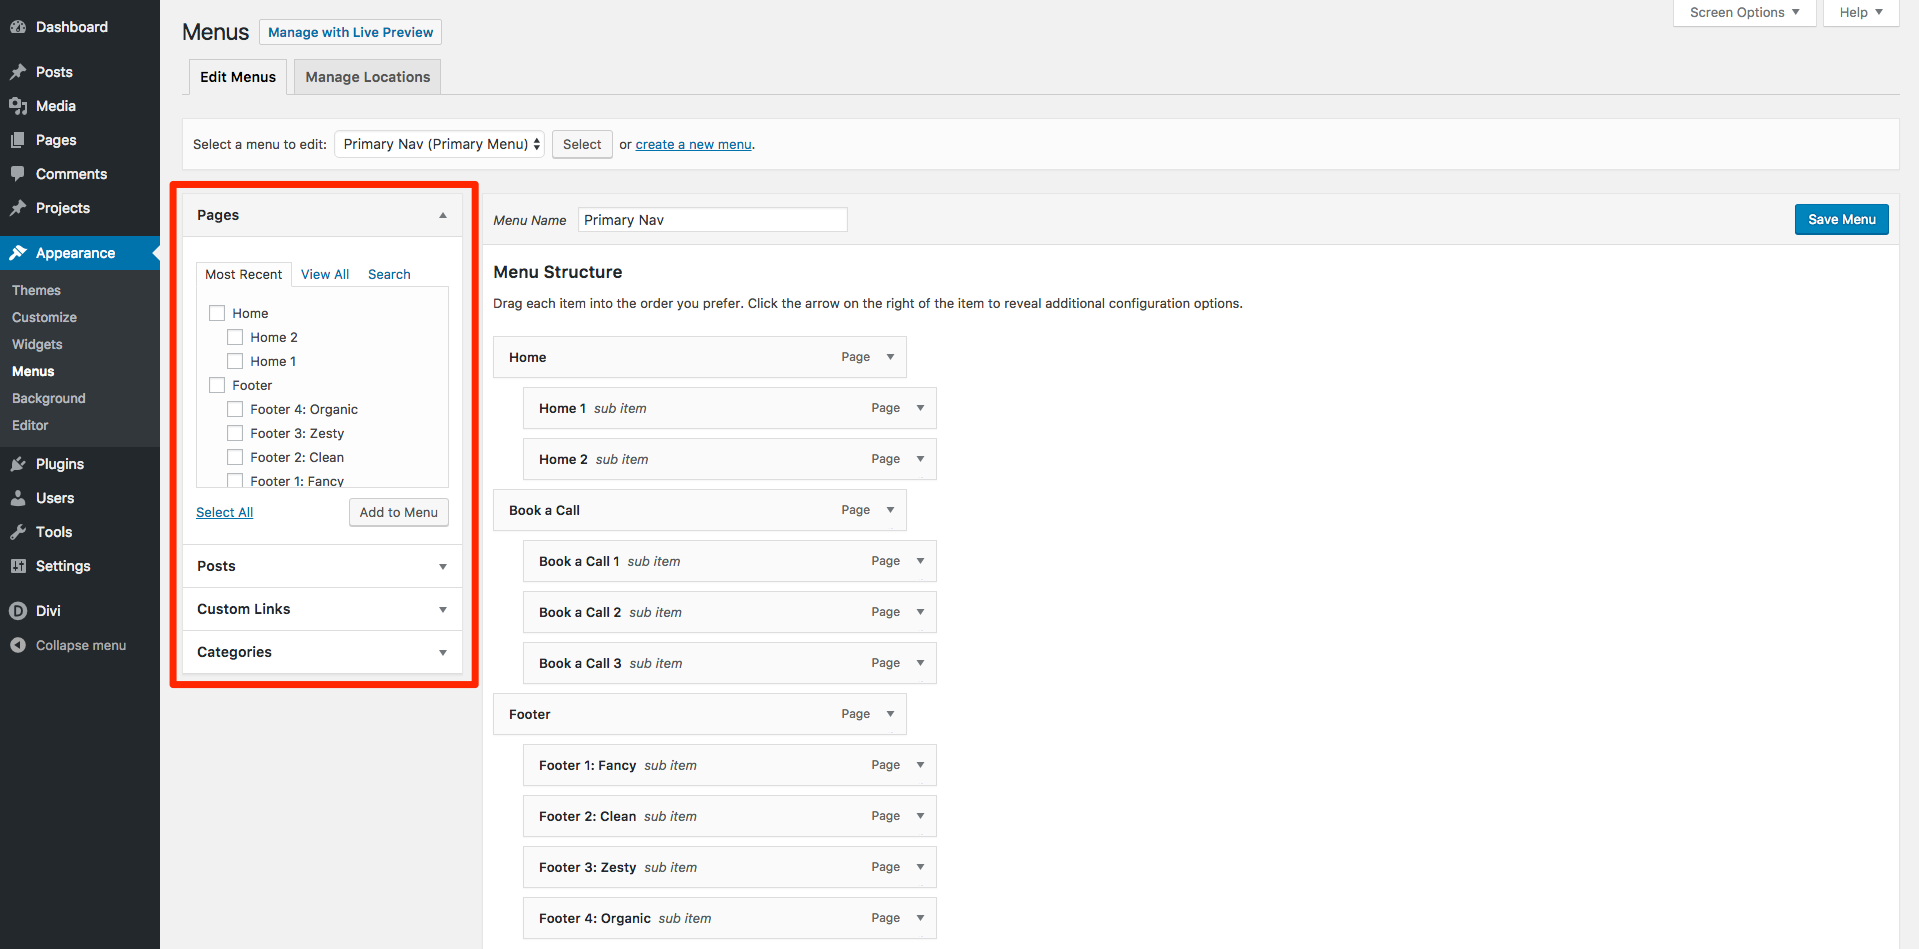
Left Part: Your Website Pages & Posts
The left part of the page gives you a handy list of the pages, posts and blog categories in your site. This area makes it really easy to find a page and add it to your menu.
Right Part: Your Current Menu
Over on the right of the page is a visual guide to your current selected menu, displayed in a simple list. Items at the top of the list will appear to the left of your menu (or at the top of your menu if you have a vertical navigation). Items in the list that are below another menu item and indented mean that they will be hidden under that item until your visitor hovers over them, whereby they will then be shown in a dropdown menu.
Now we know our way around this page we’re ready to begin making some changes to our menus.
How to add a new menu item
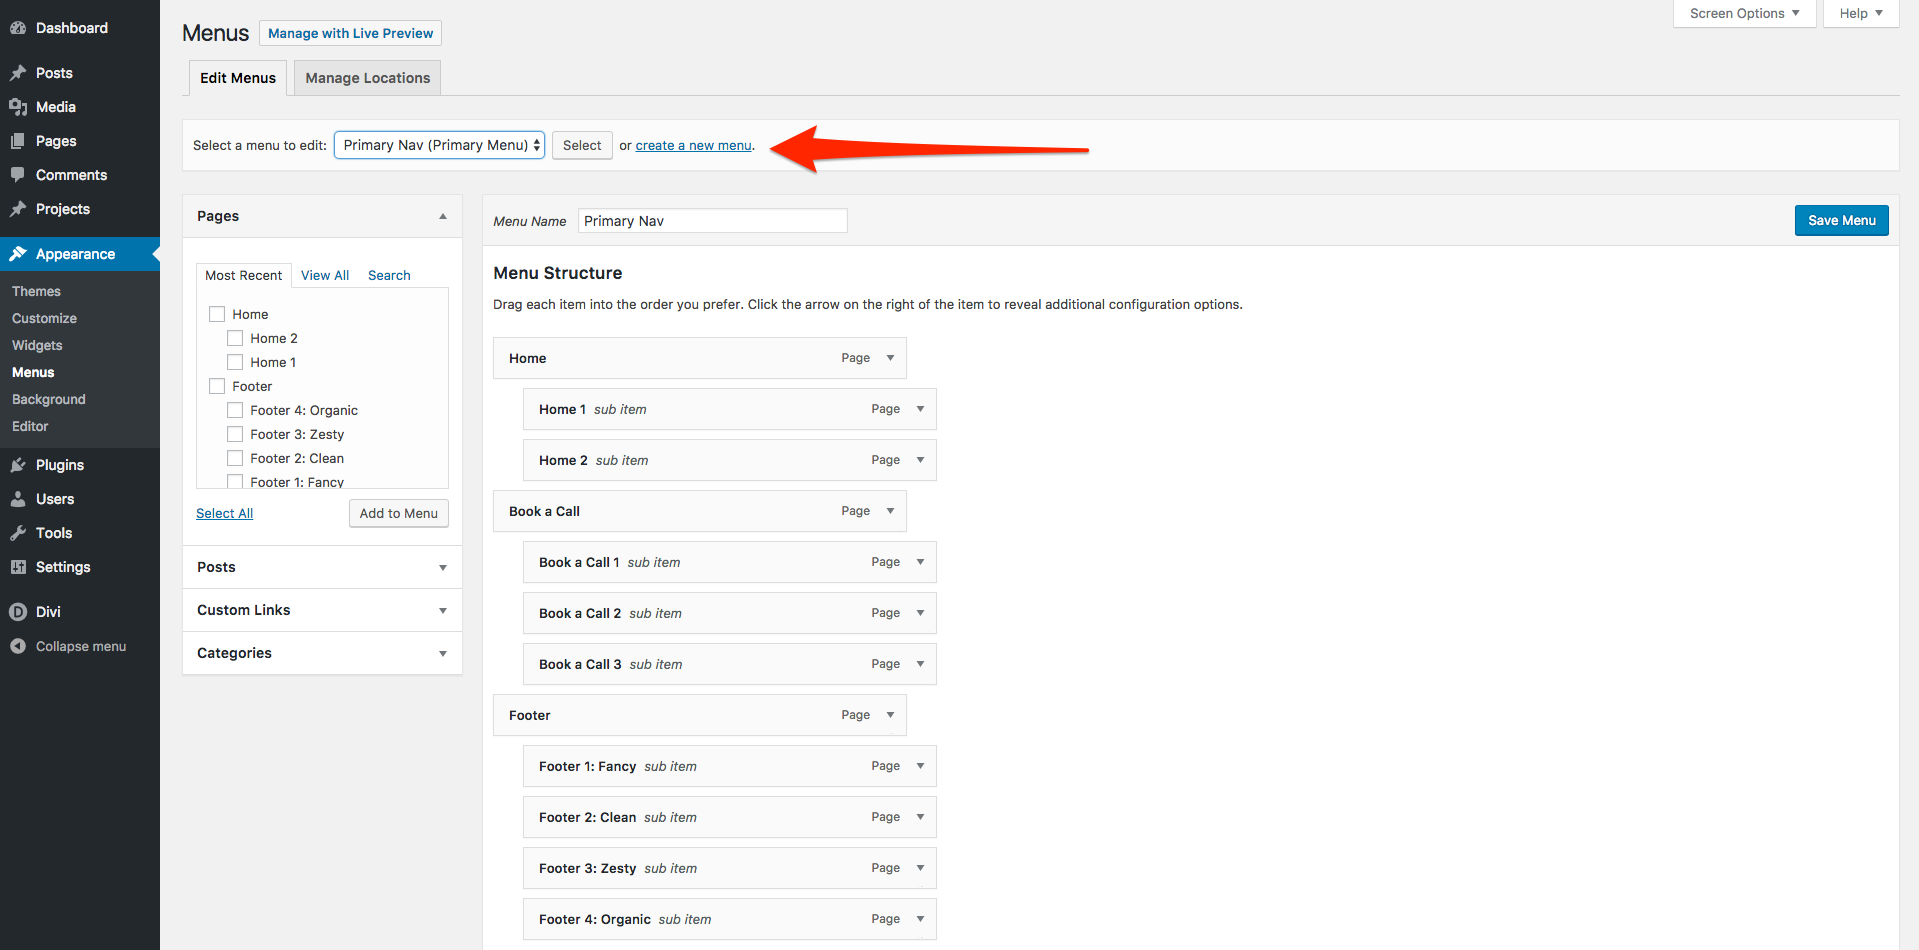
Step 1: Use the menu selector in the top part to select the menu you’d like to edit.
You may only have one menu on your website, if this is the case then you will only have one option in the drop down box.
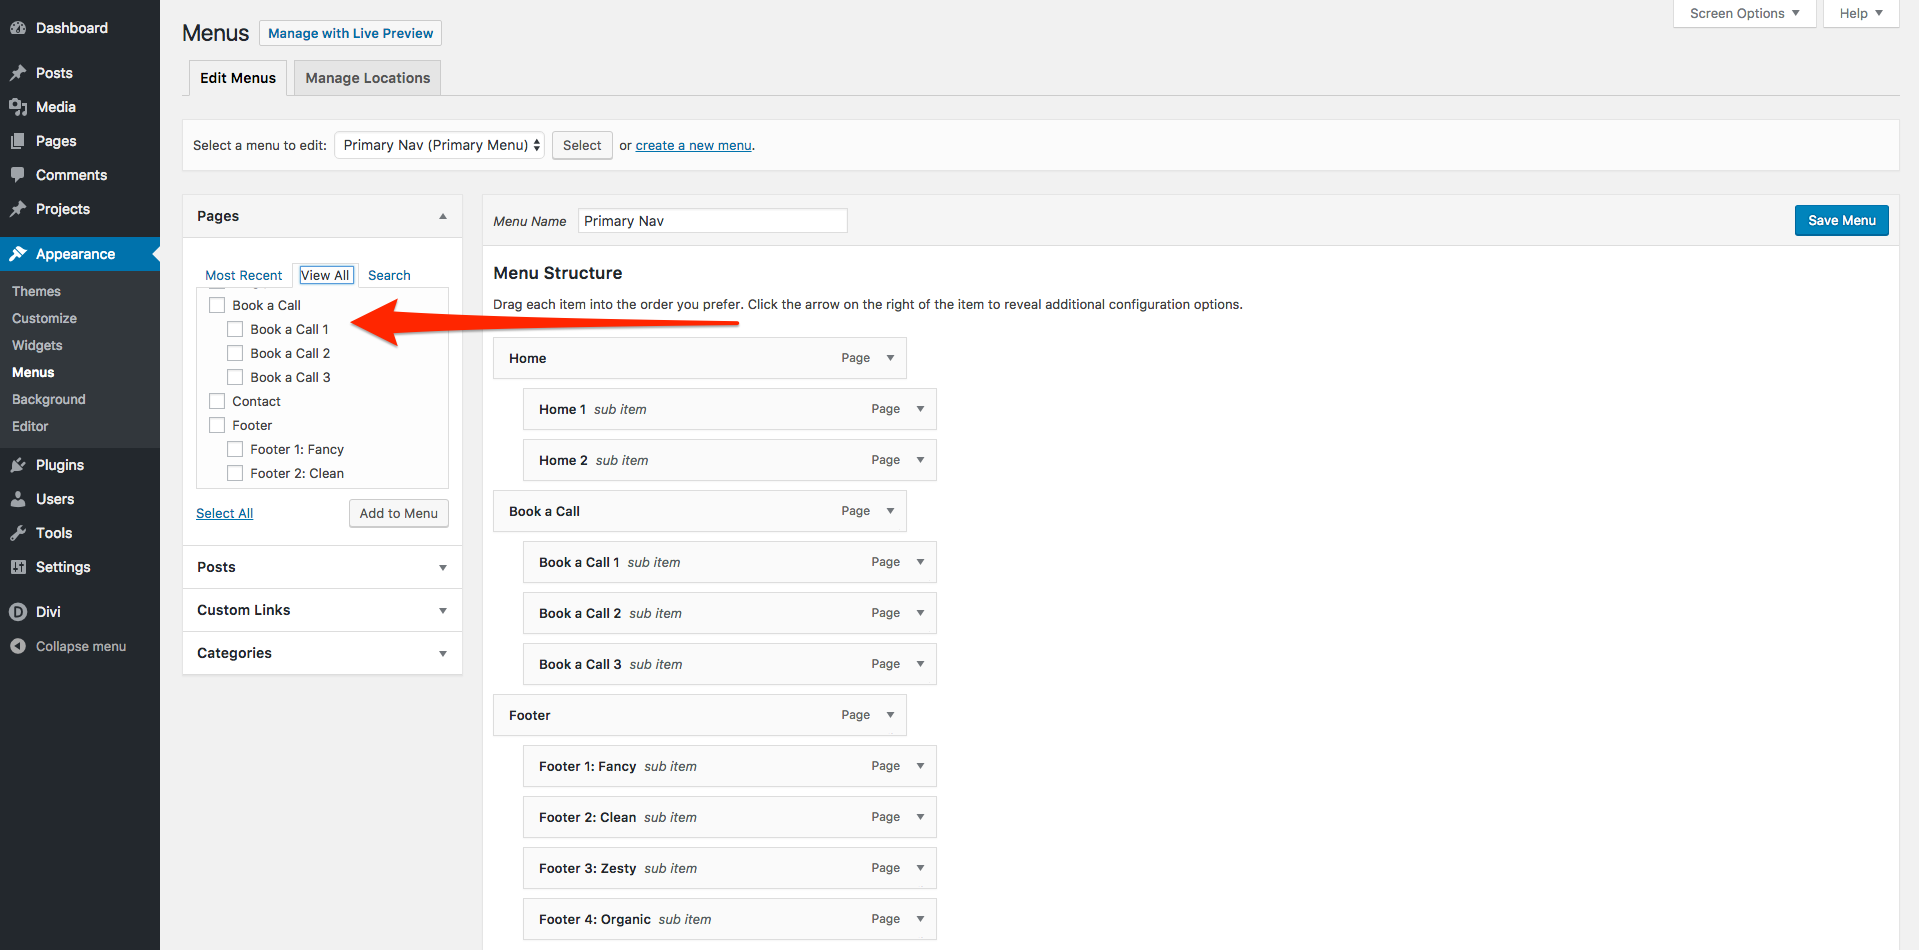
Step 2a: Find the page, page or category you’d like to add.
With our menu selected it is now time to find the post, page or blog category in the left part of the page. If you would like to add a page to your menu simply locate it in the ‘Pages’ tab under the ‘Most Recent’ section. If you can’t find the page you are looking for there, be sure to click on ‘View All’ to see a complete list of all the public pages available on your site. To add a blog post or a blog category to your menu simply click on the ‘Posts’ or ‘Categories’ tab to open it and then follow similar steps as described above.
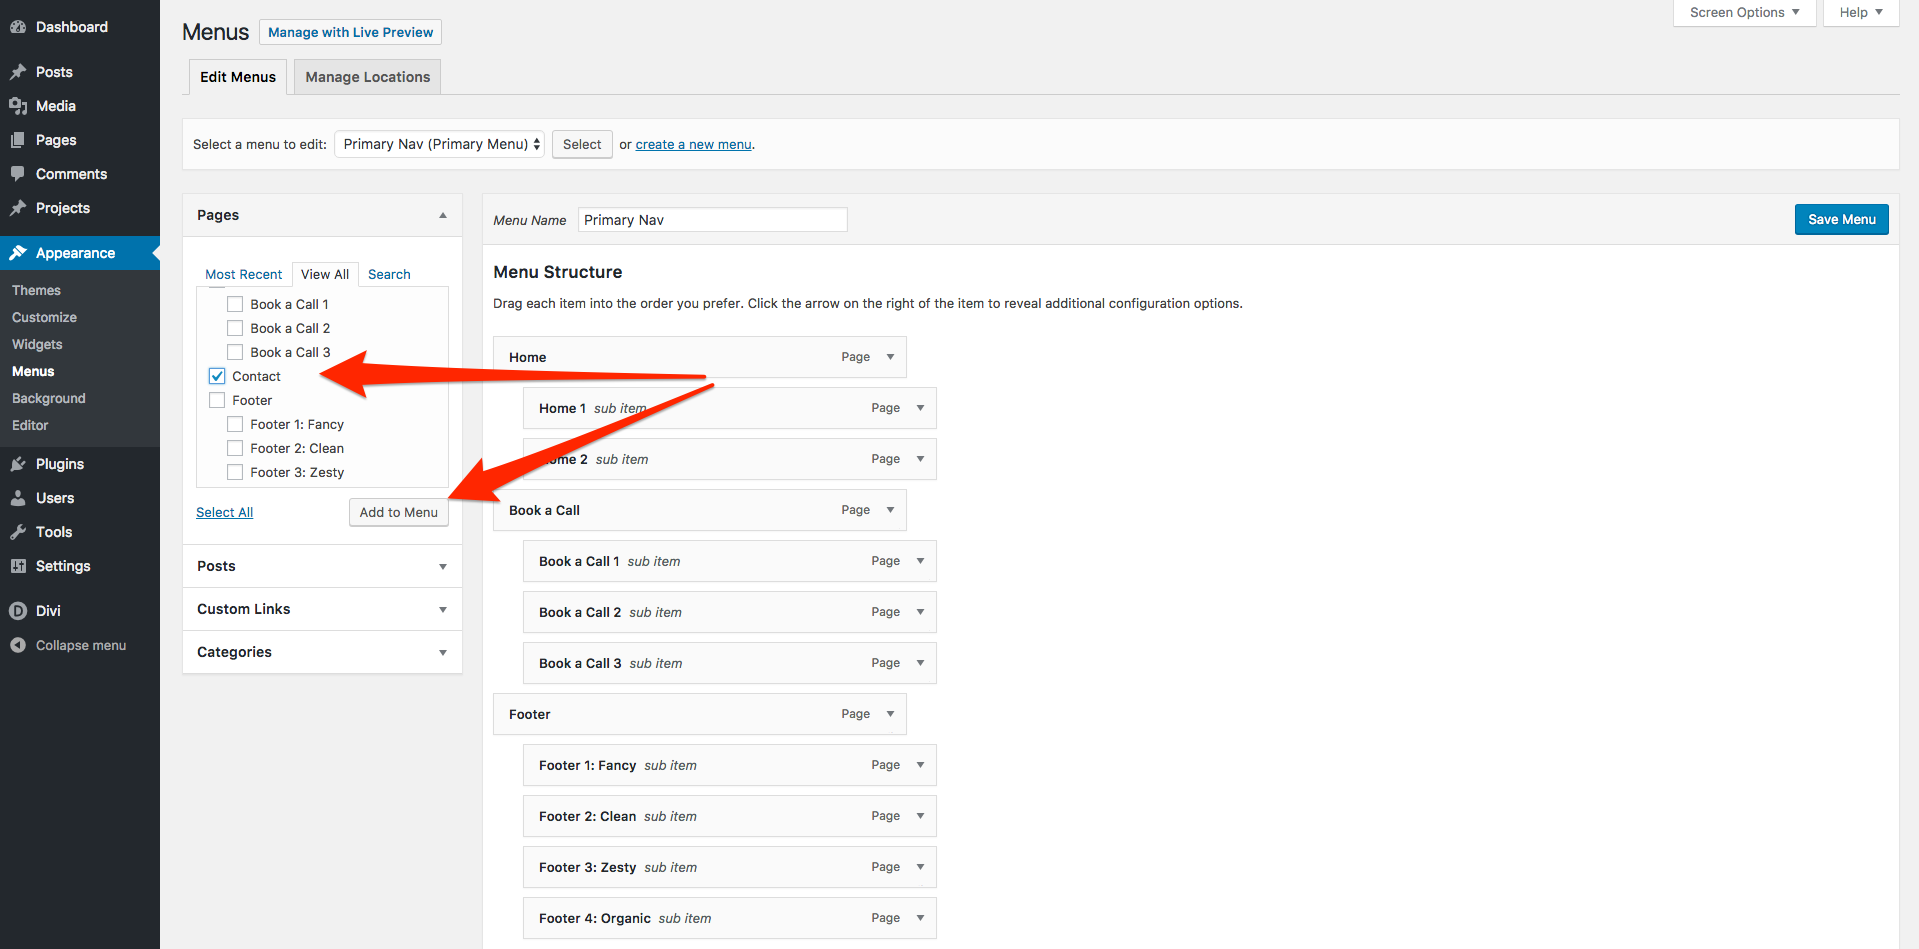
When you find the page or post you’d like to add to you menu just click the box next to it and then click the ‘Add to Menu’ button.
If you like you can tick multiple posts or pages to add them at the same time.
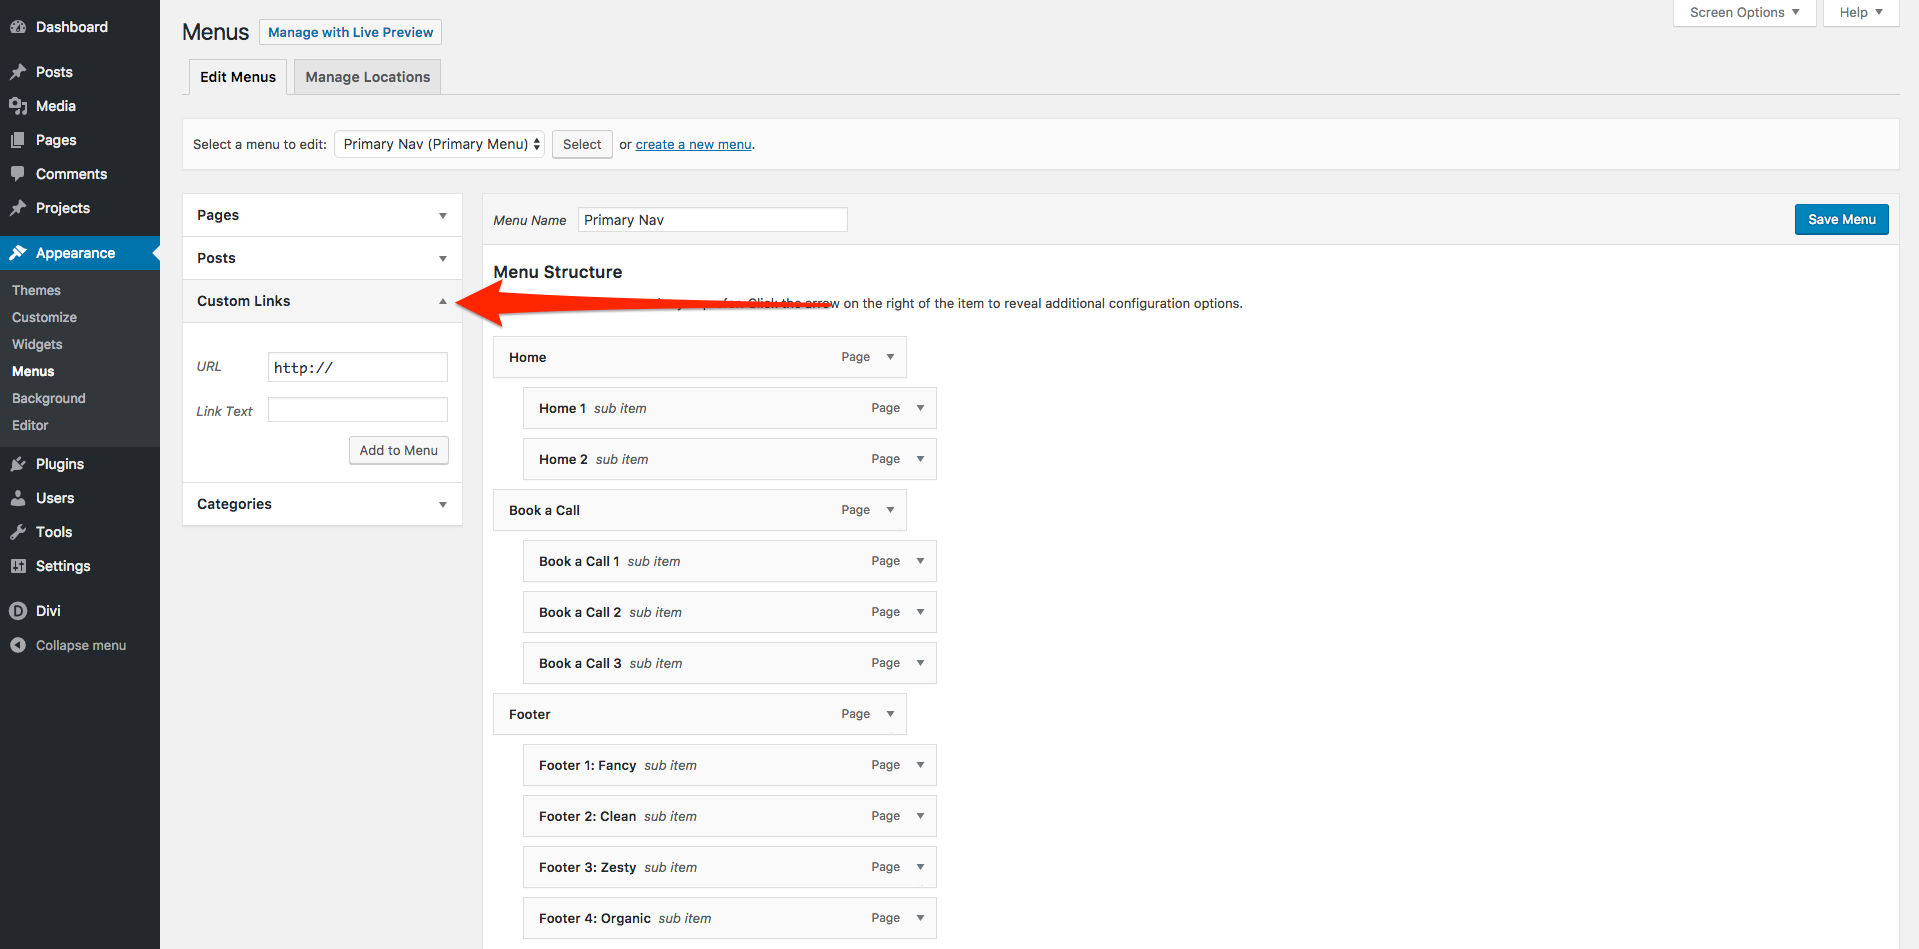
Step 2b: Adding a custom link to your menu.
One other option we have is the ability to add a custom link to our menu. A custom link is a link to any other webpage that isn’t a part of your own site, for example: Facebook, Twitter, LinkedIn etc. Adding custom links can be useful for many reasons; perhaps you’d like a link in your menu that opens up your YouTube channel? Or perhaps you would like to direct your visitors to your product hosted on a site such as Gumroad or Etsy. To add a custom link click on the ‘Custom Links’ tab to open it.
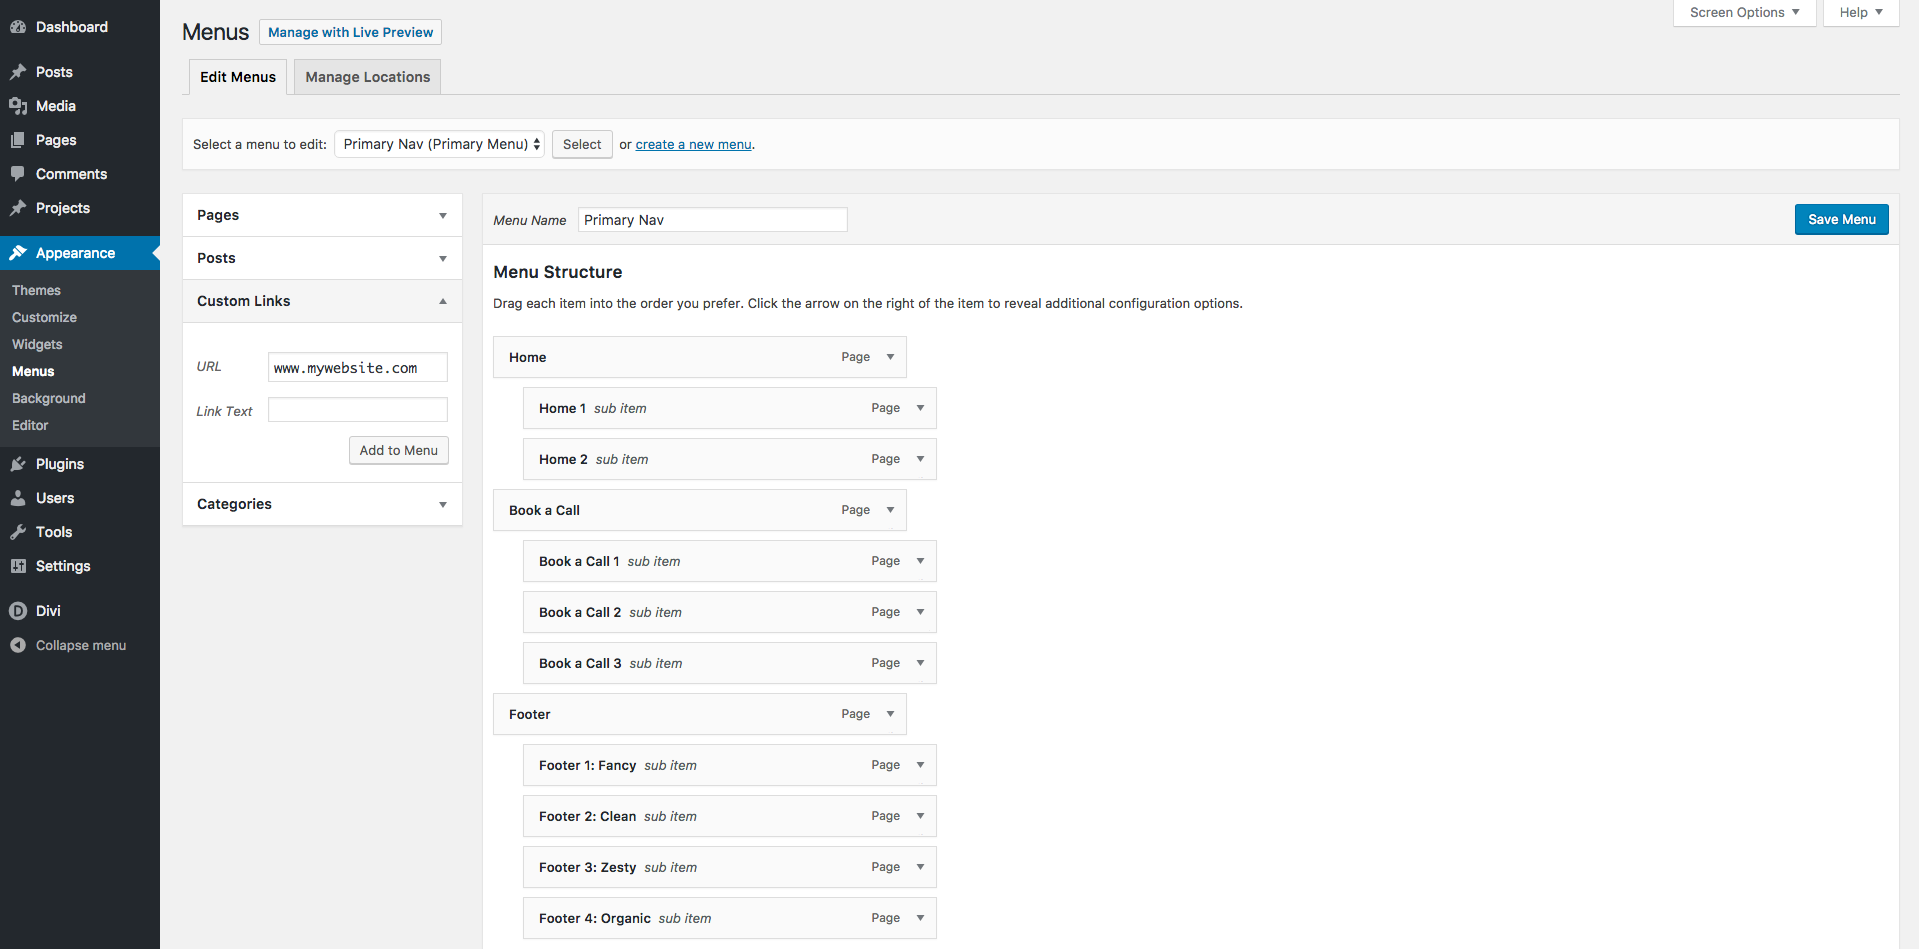
Unlike posts, pages and categories where we can simply select the pages we want to add, for custom links we need to actually include the full link to the page. Type or paste your link in the ‘URL’ box – be sure to delete the ‘http://’ that is already in the box if your link has it already. You want to avoid your link looking like this: https://https://www.mywebsite.come/. Any of the following should be acceptable:
- https://www.mywebsite.com/
- www.mywebsite.com
- mywebsite.com
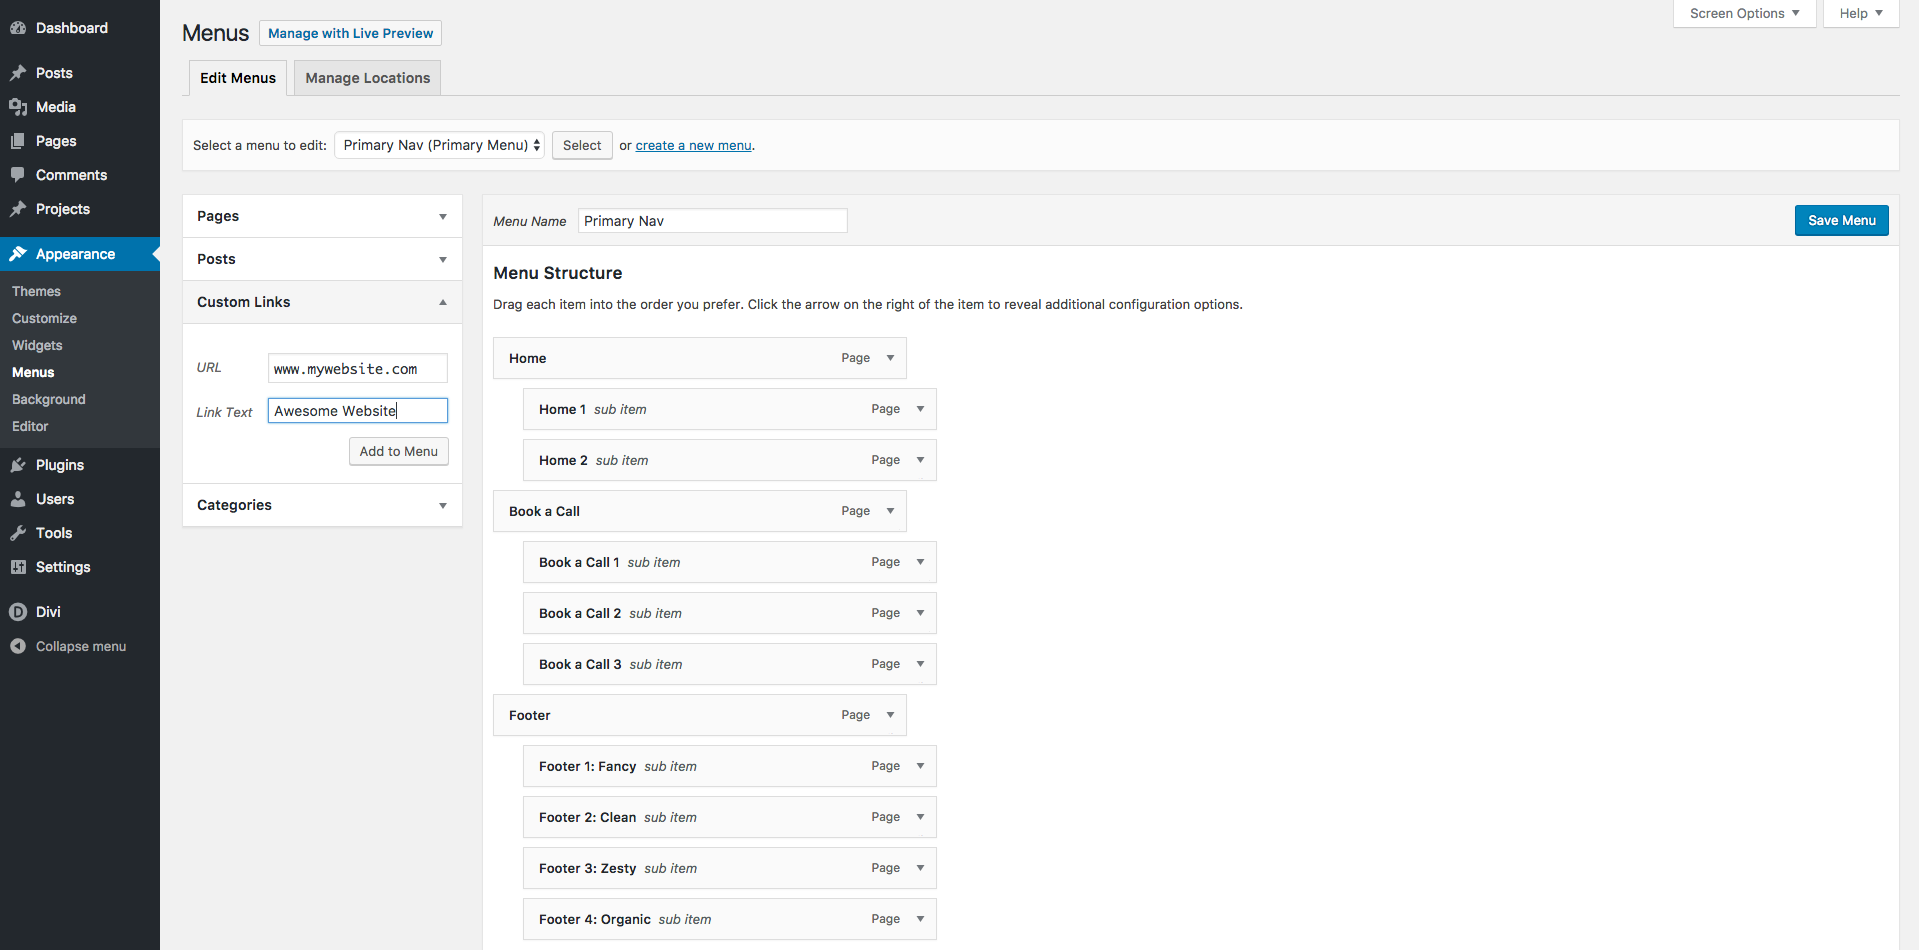
Next we need to give our link a label and we can do this in the ‘Link Text’ box. This is a way to make the link look neater and more friendly in your menu. For this example I don’t want the full link to be displayed in my menu, I’d much prefer the link to say ‘Awesome Website’ instead. So I’ll go ahead and type that in to the ‘Link Text’ box…
Finally, I’ll add this to my menu by clicking the ‘Add to Menu’ button.
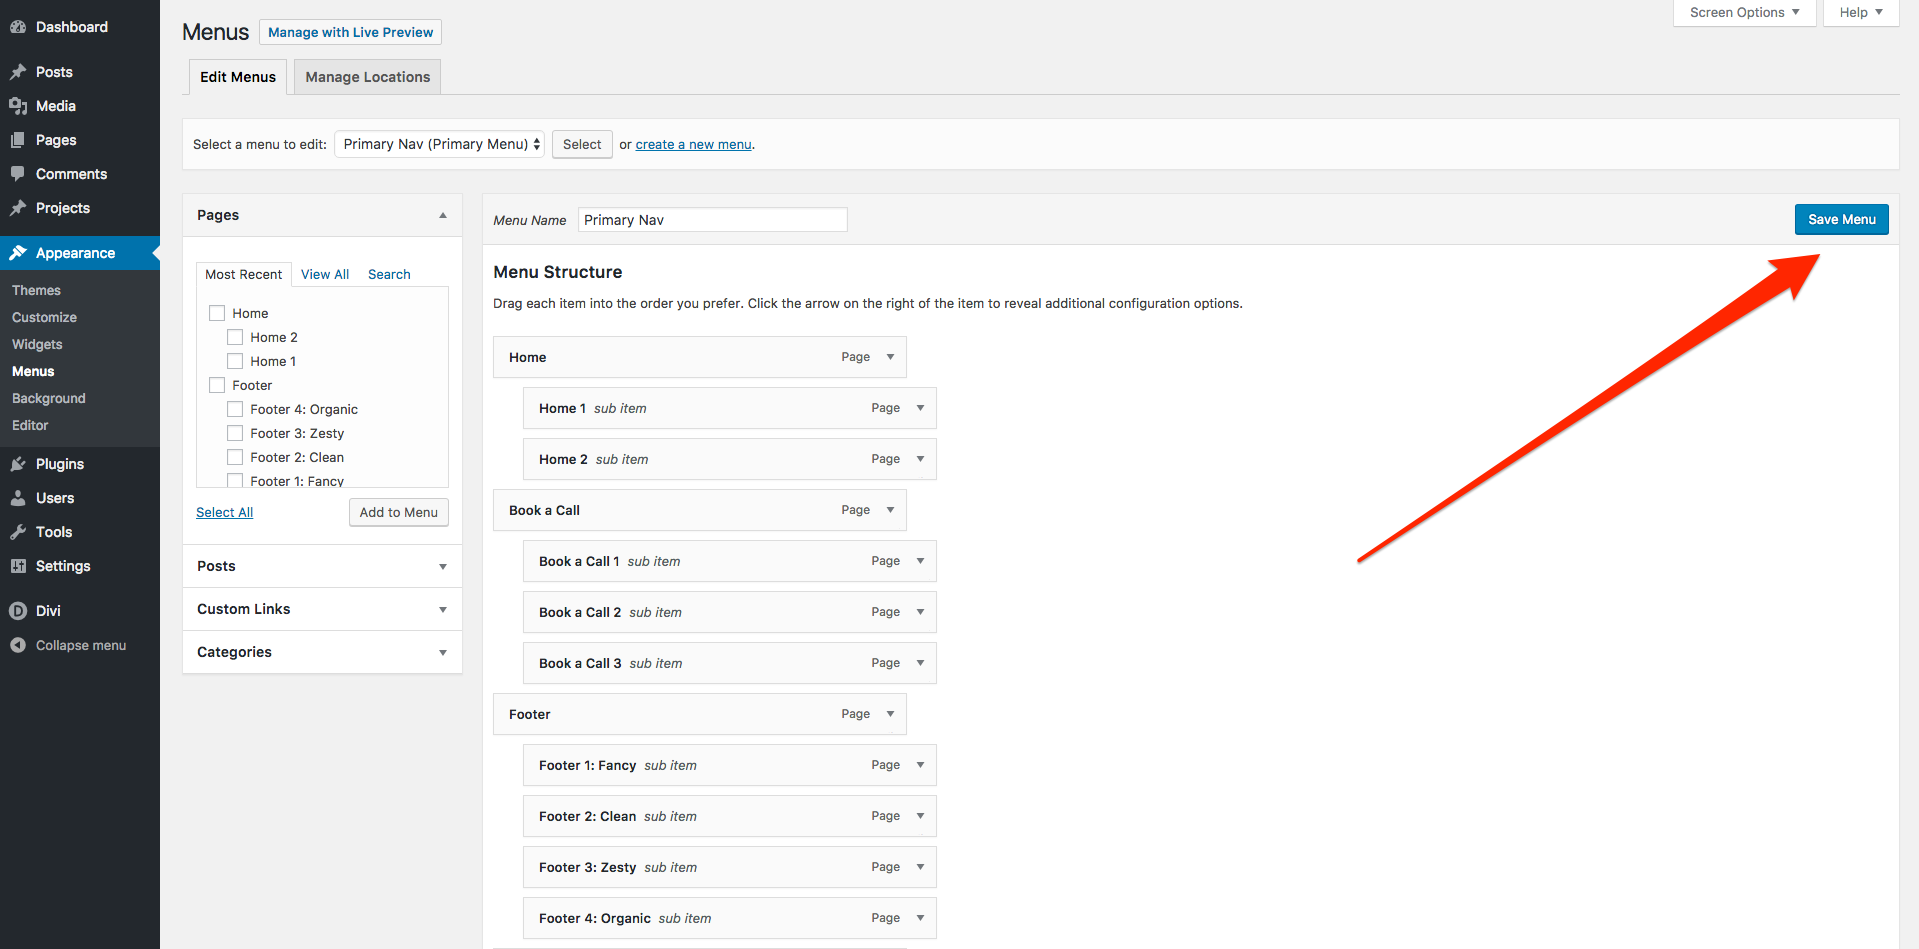
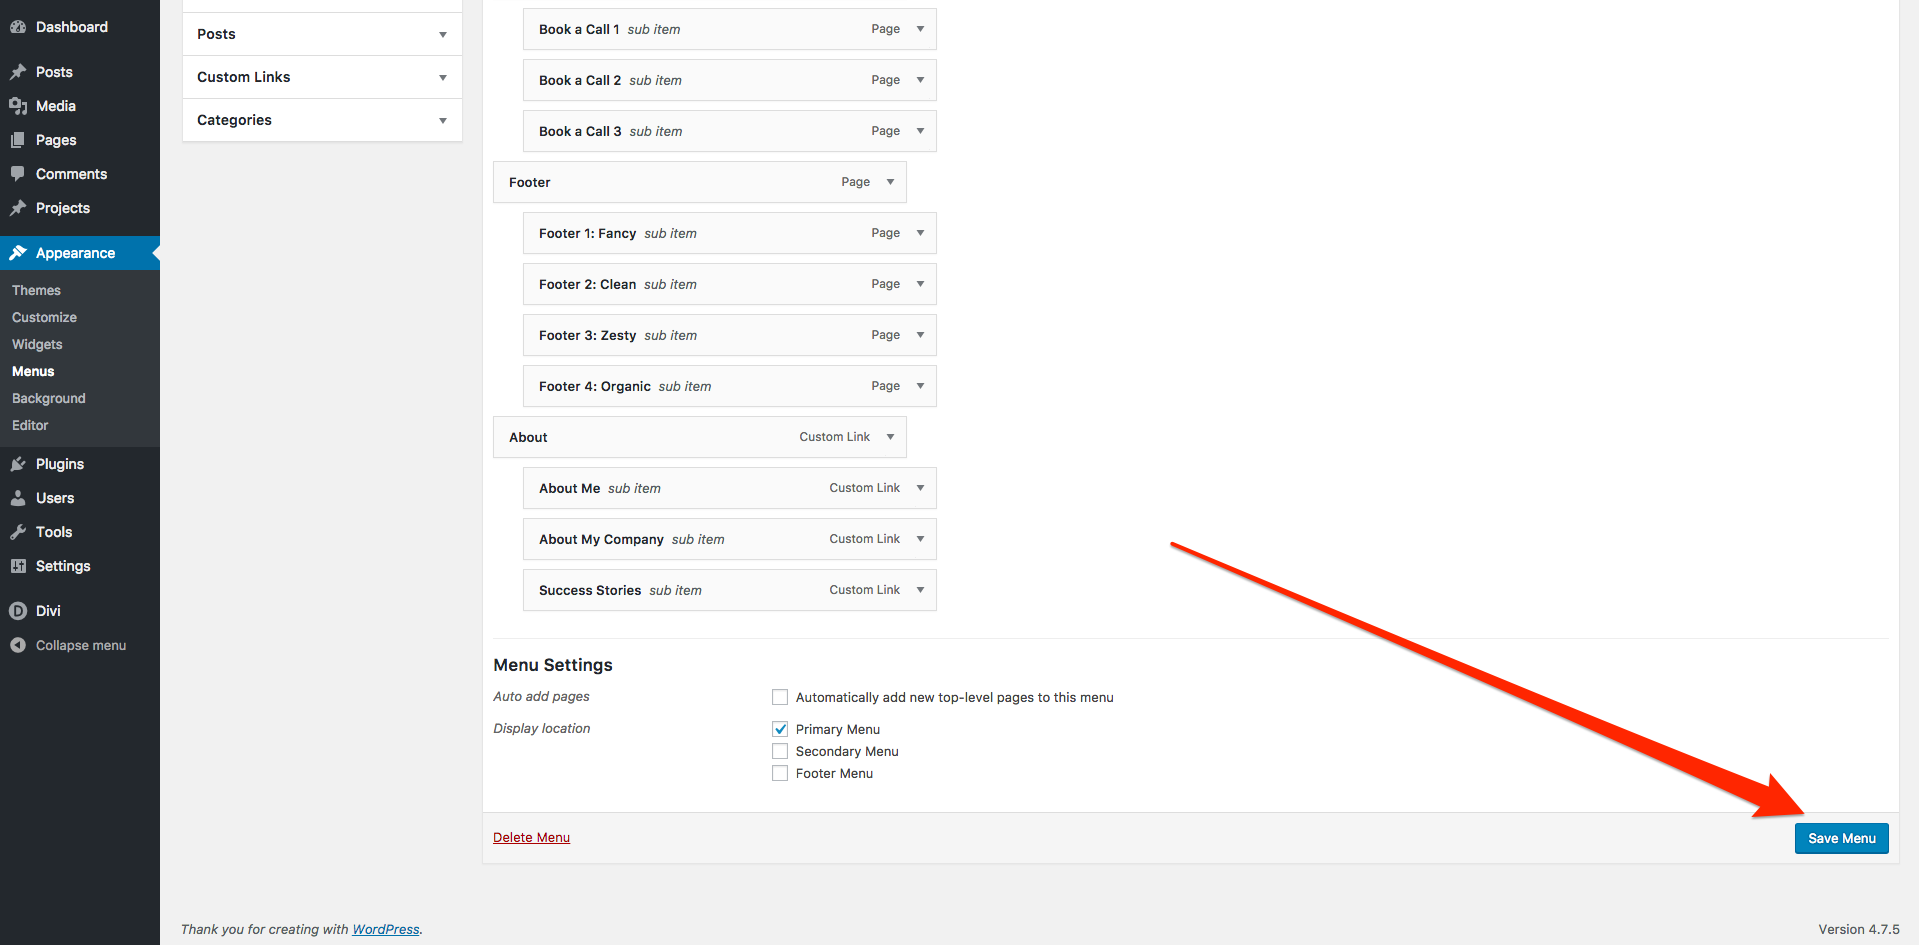
Step 3: Click on the ‘Save Menu’ button to save your changes.
How to remove a menu item
Step 1: Use the menu selector in the top part to select the menu you’d like to edit.
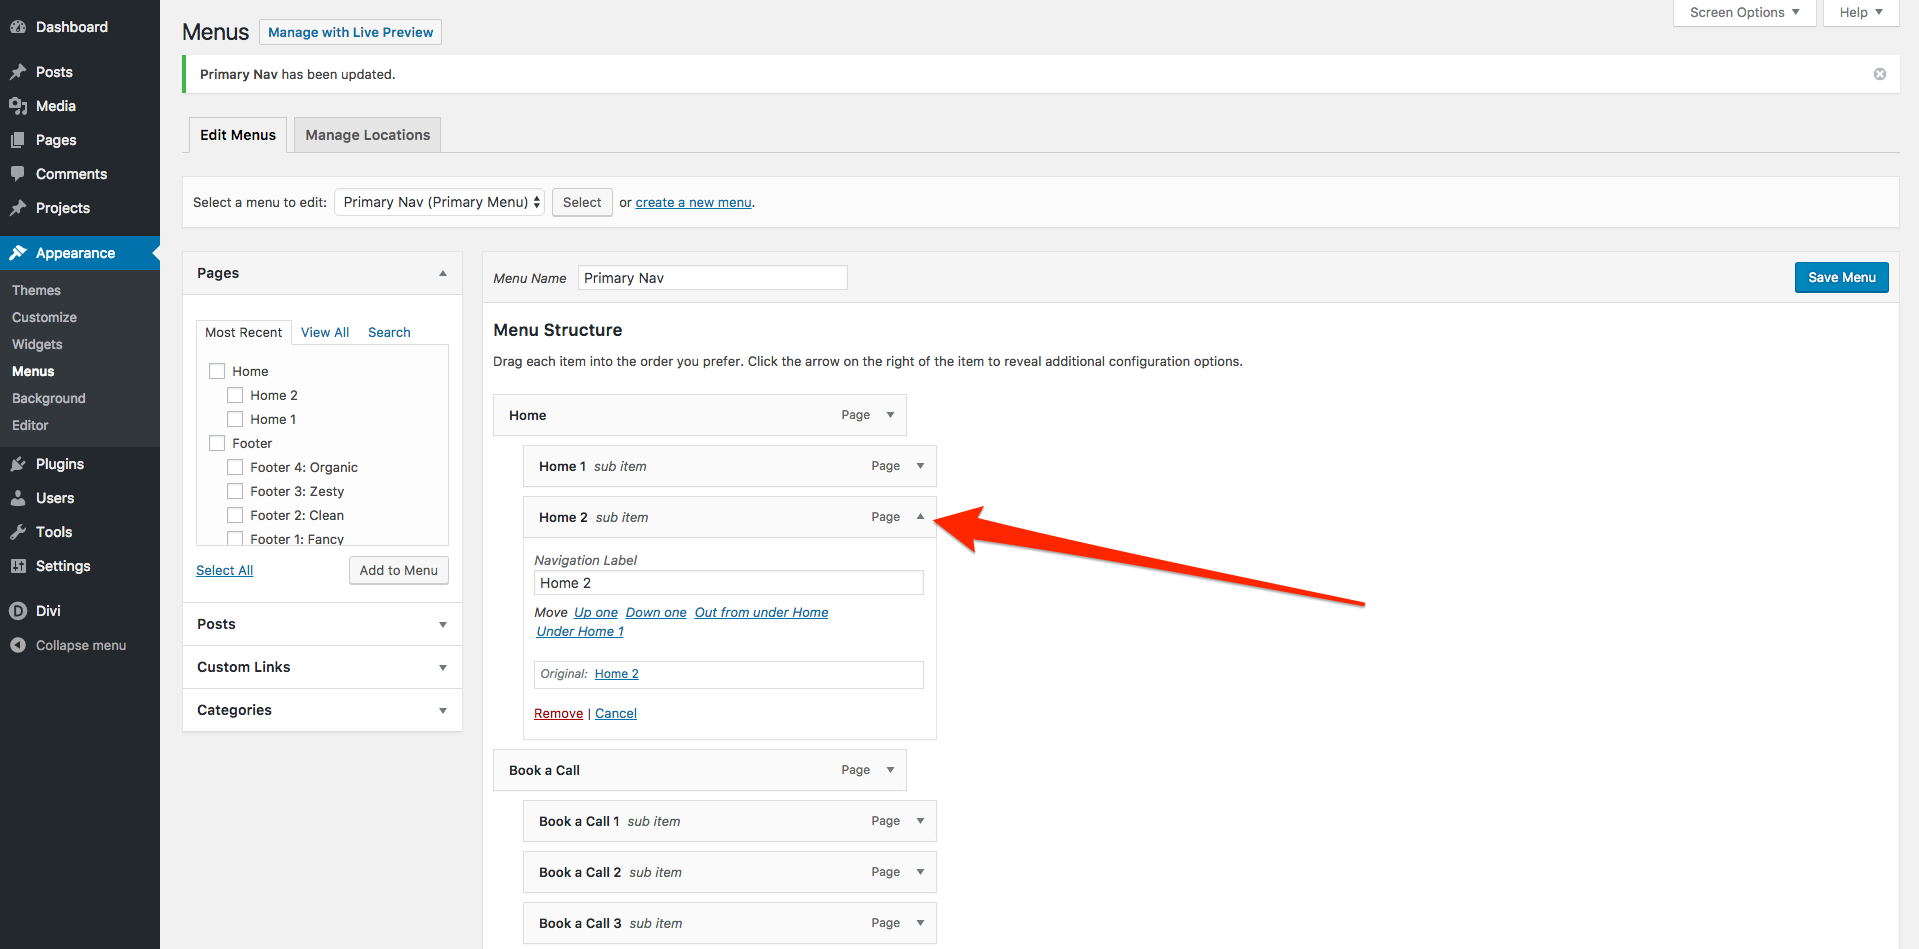
Step 2: Locate the menu item you’d like to remove, then click on the arrow to the right of it.
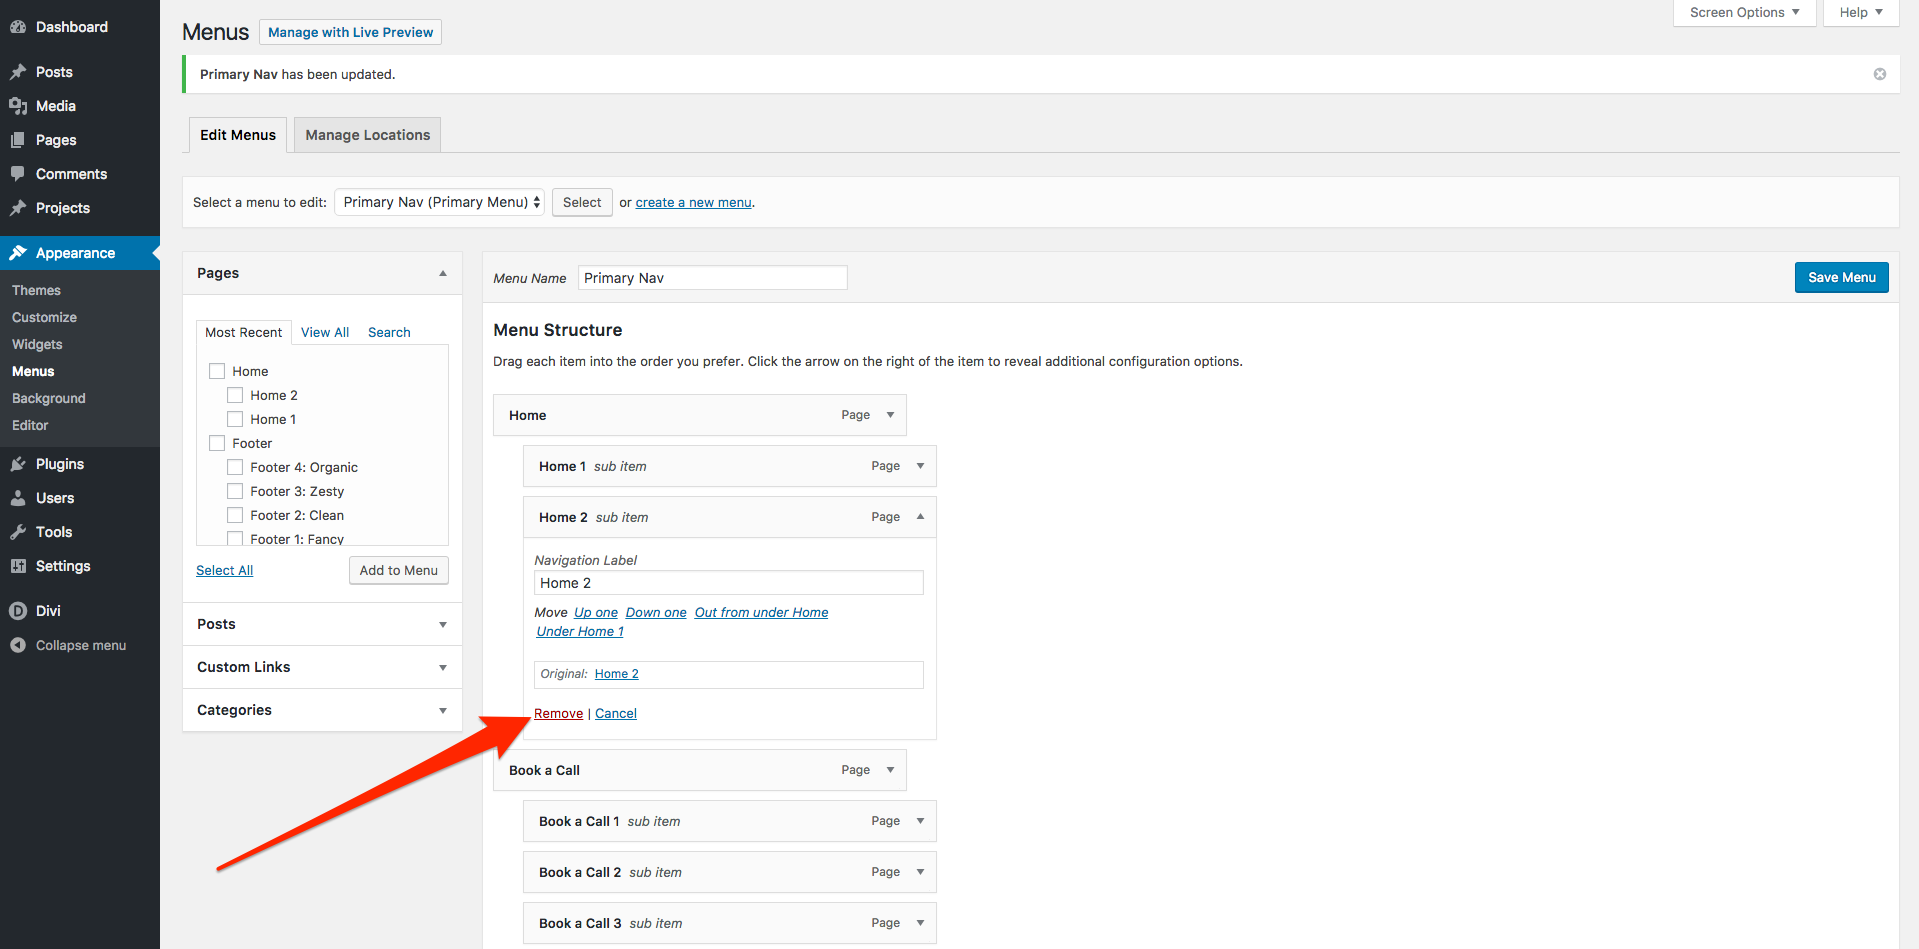
Step 3: Click on ‘Remove’ to delete the item from your menu.
Note: Deleting an item from your menu does not delete the page/post itself.
Step 4: Click on the ‘Save Menu’ button to save your changes.
How to rename a menu item
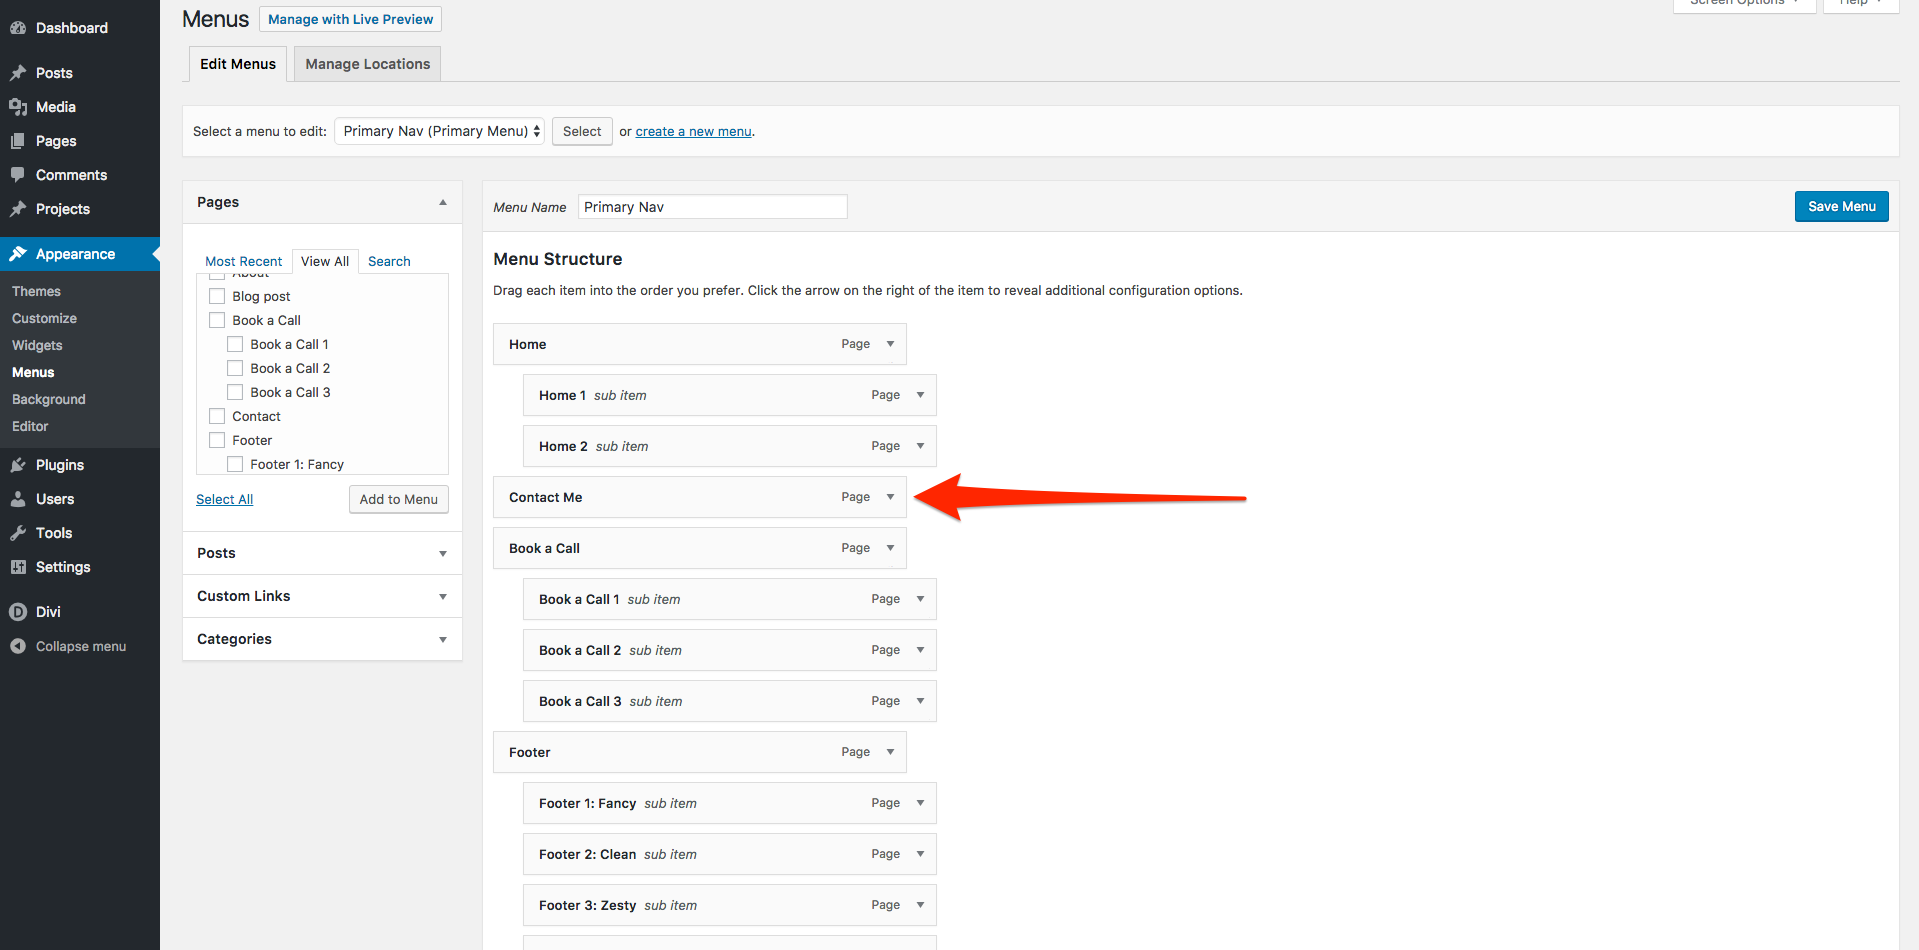
Occasionally you may want to change the label of a menu item but keep the link the same. Perhaps when you first launched your site you were working solo, but now you have a partner or a team. In situations like this it would be useful to alter page labels such as ‘Contact Me’ to say ‘Contact Us’. Fortunately doing this on your website is quick and easy.Step 1: On the right part of the page, find the menu item you’d like to rename.
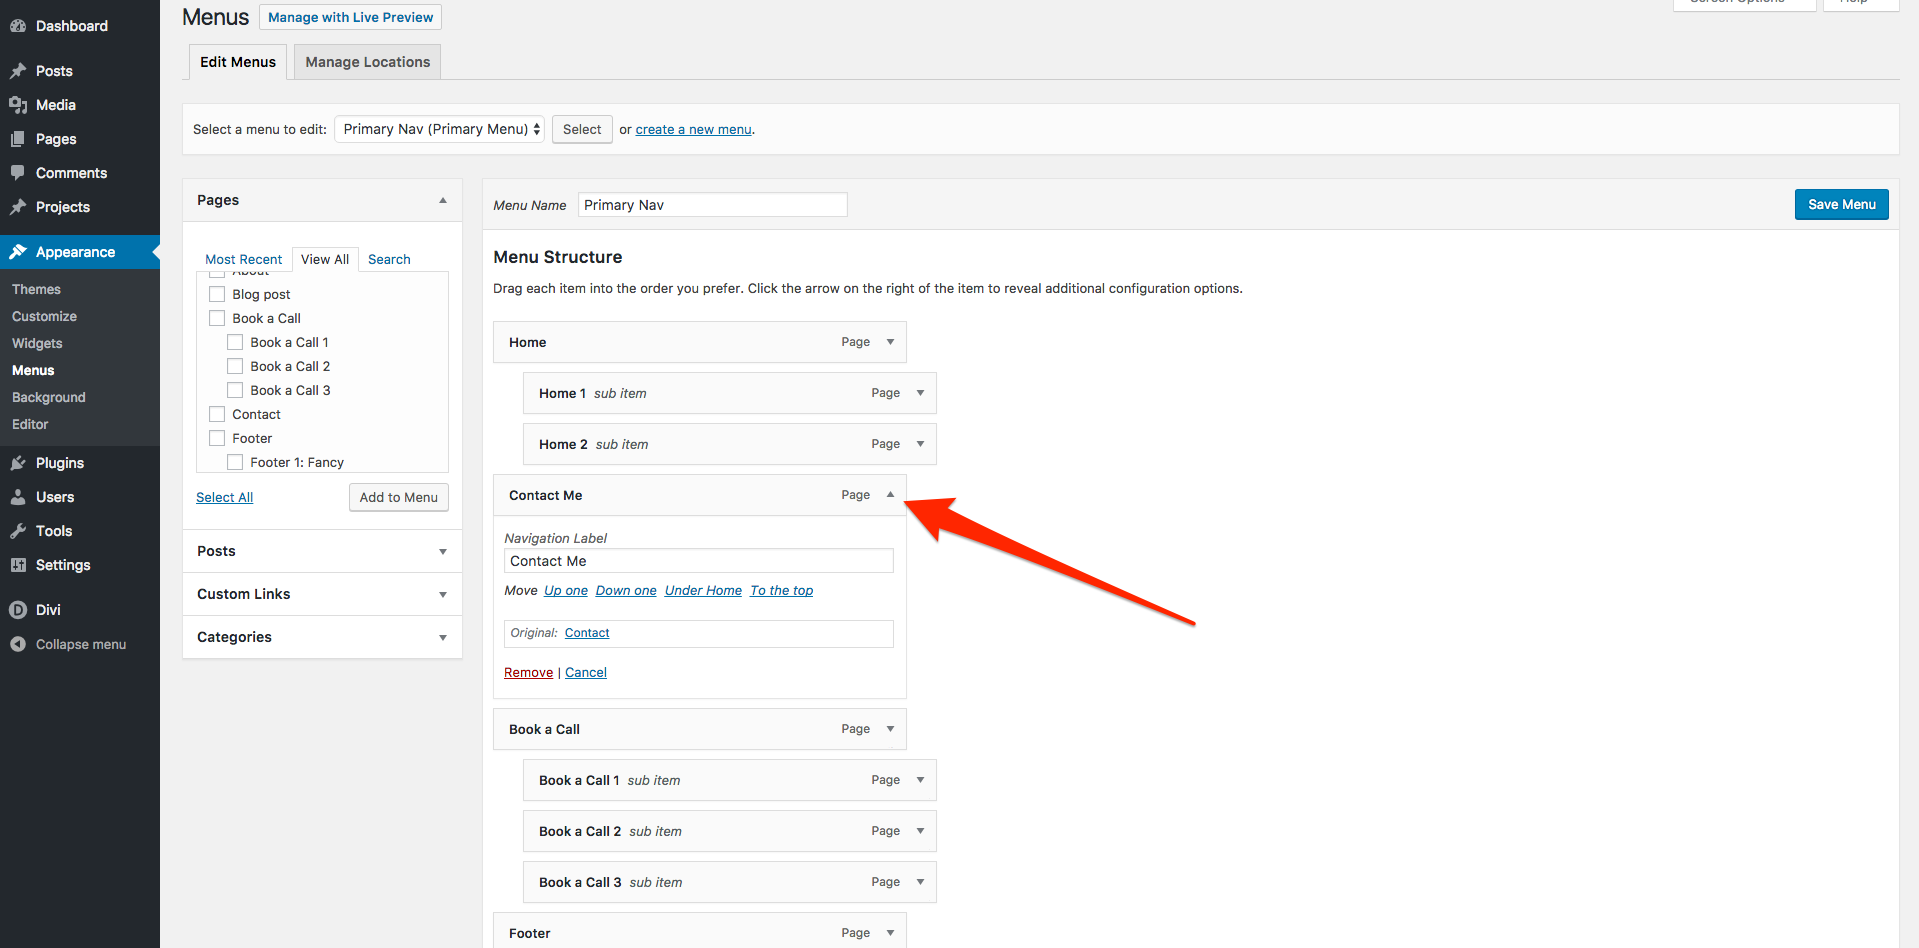
Step 2: Click on the arrow next to the menu item to open it.
Step 3: Change the text in the ‘Navigation Label’ to whatever you like.
Step 4: Click the ‘Save Menu’ button to save your changes.
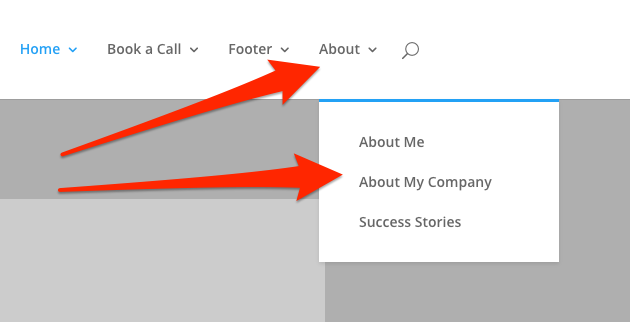
How to add menu items from drop down menus
Website menus play a very important job and their use is often overlooked – when was the last time you felt thankful for a well designed website menu? Chances are you can’t remember, and that’s a good thing! Good design is often invisible and the same goes for menu design too. But what if you have lots of important links, how do we provide easy access without making our website messy? The answer is drop down menus. When we have a lot of menu items we can often group them under other items. So you might have a link that says ‘About’ in your menu but when a visitor hovers over them they will be met with a list of other, similar links such as ‘About Me’, ‘About My Company’ and ‘Success Stories’. Drop down menus ensure your menu is useful without being cluttered.Step 1: First, add all of your menu items to your menu.
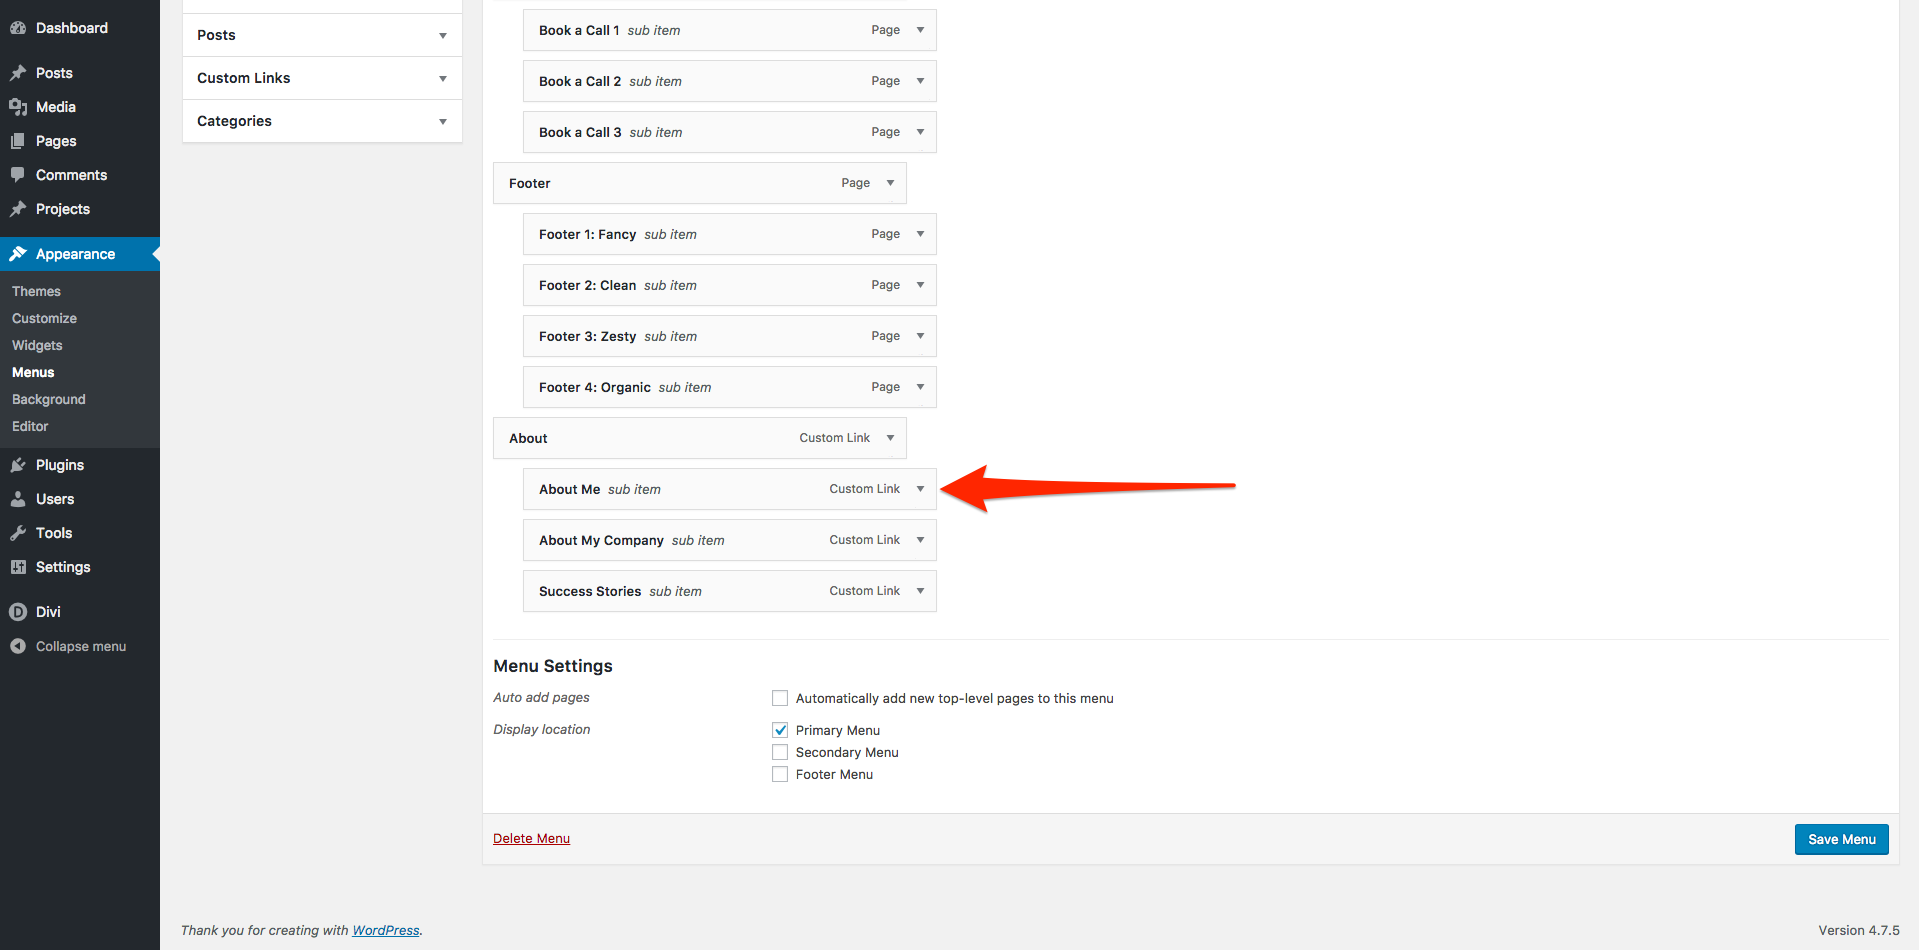
Notice that all of the menu items I have added are all lined up the same. This means that they will each appear next to each other in our menu, like this…
We want the last three pages to be displayed in a drop down menu under ‘About’ – we call this ‘nesting’. To do this we need to indent the three pages so that they will be ‘nested’ under the ‘About’ menu item.
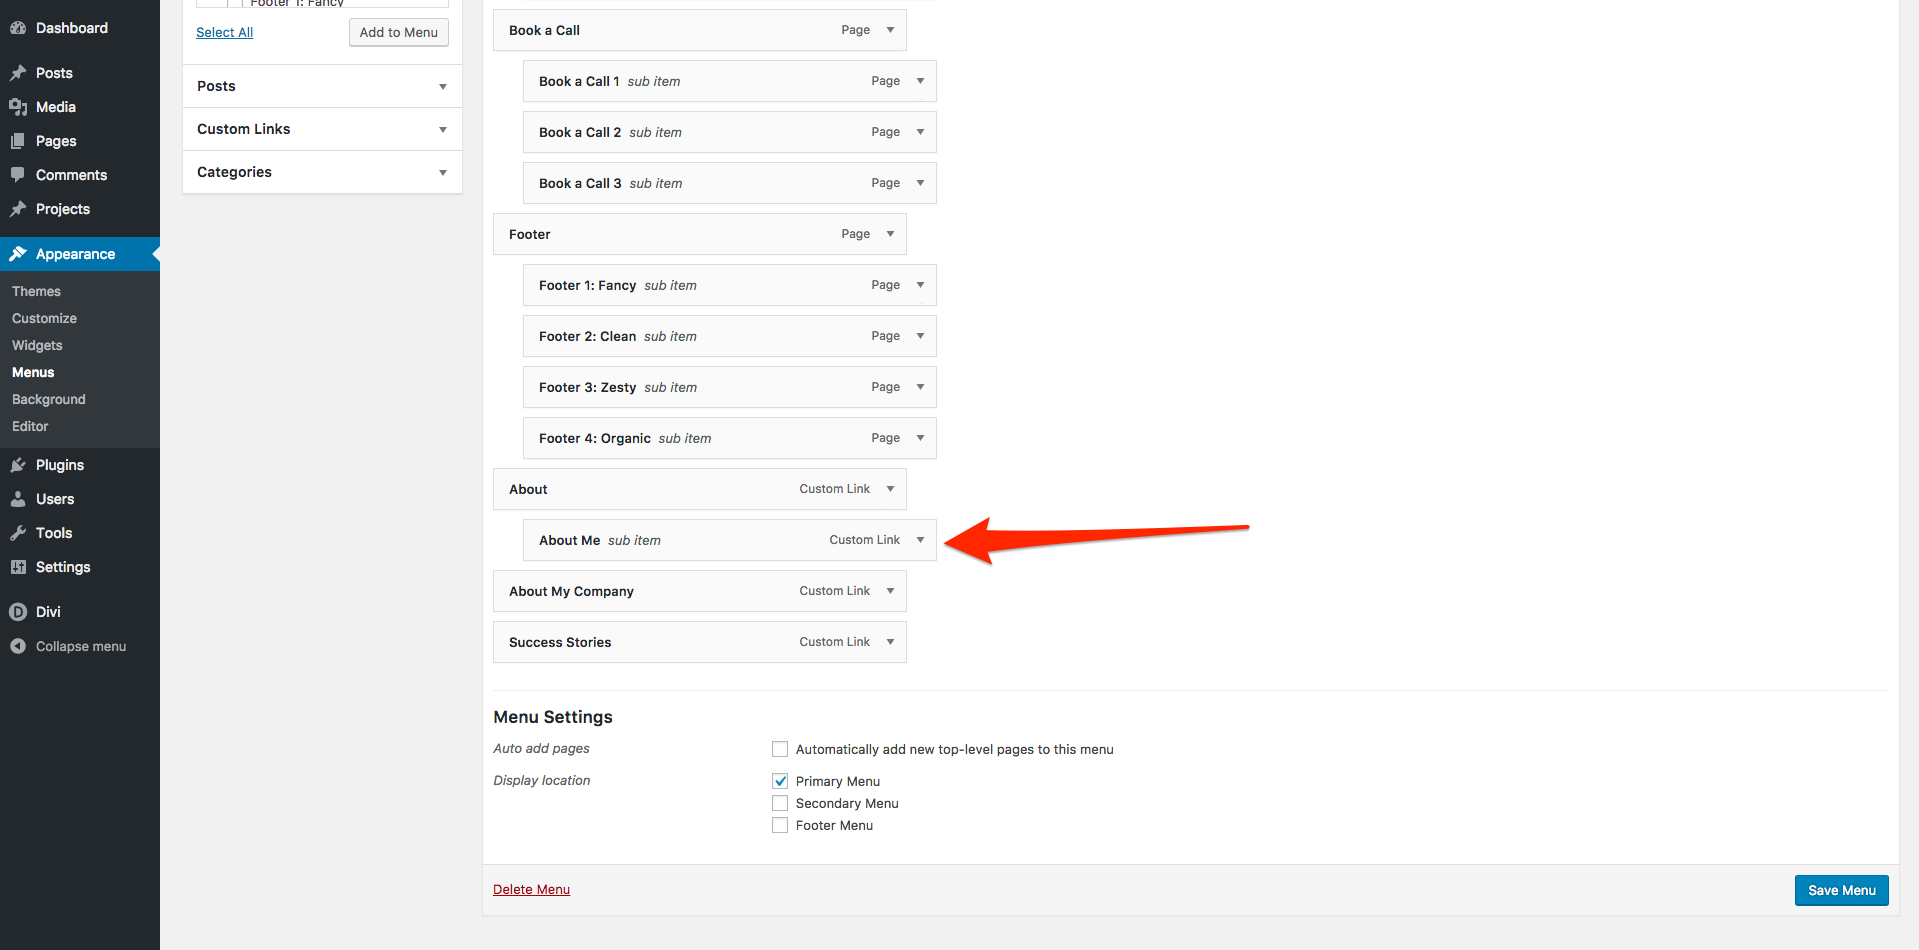
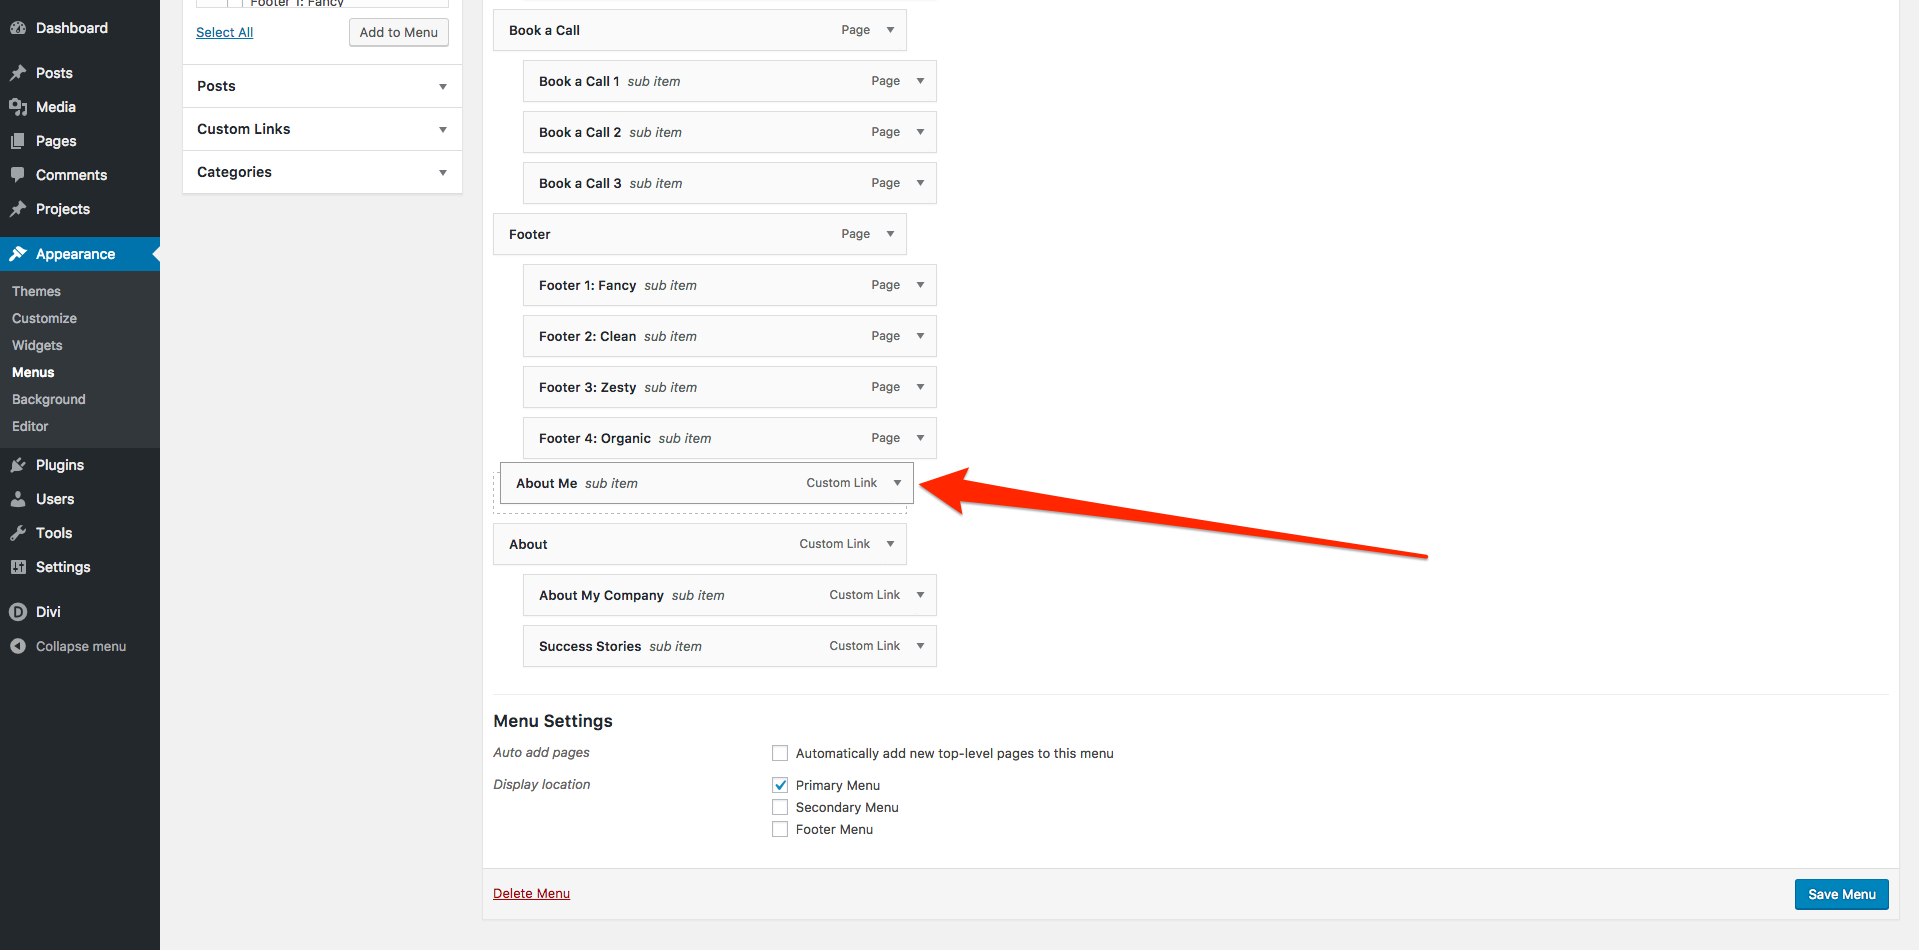
Step 2: Starting with the menu item directly below the item we are nesting under, hover over it then click and drag it to the right until it indents.
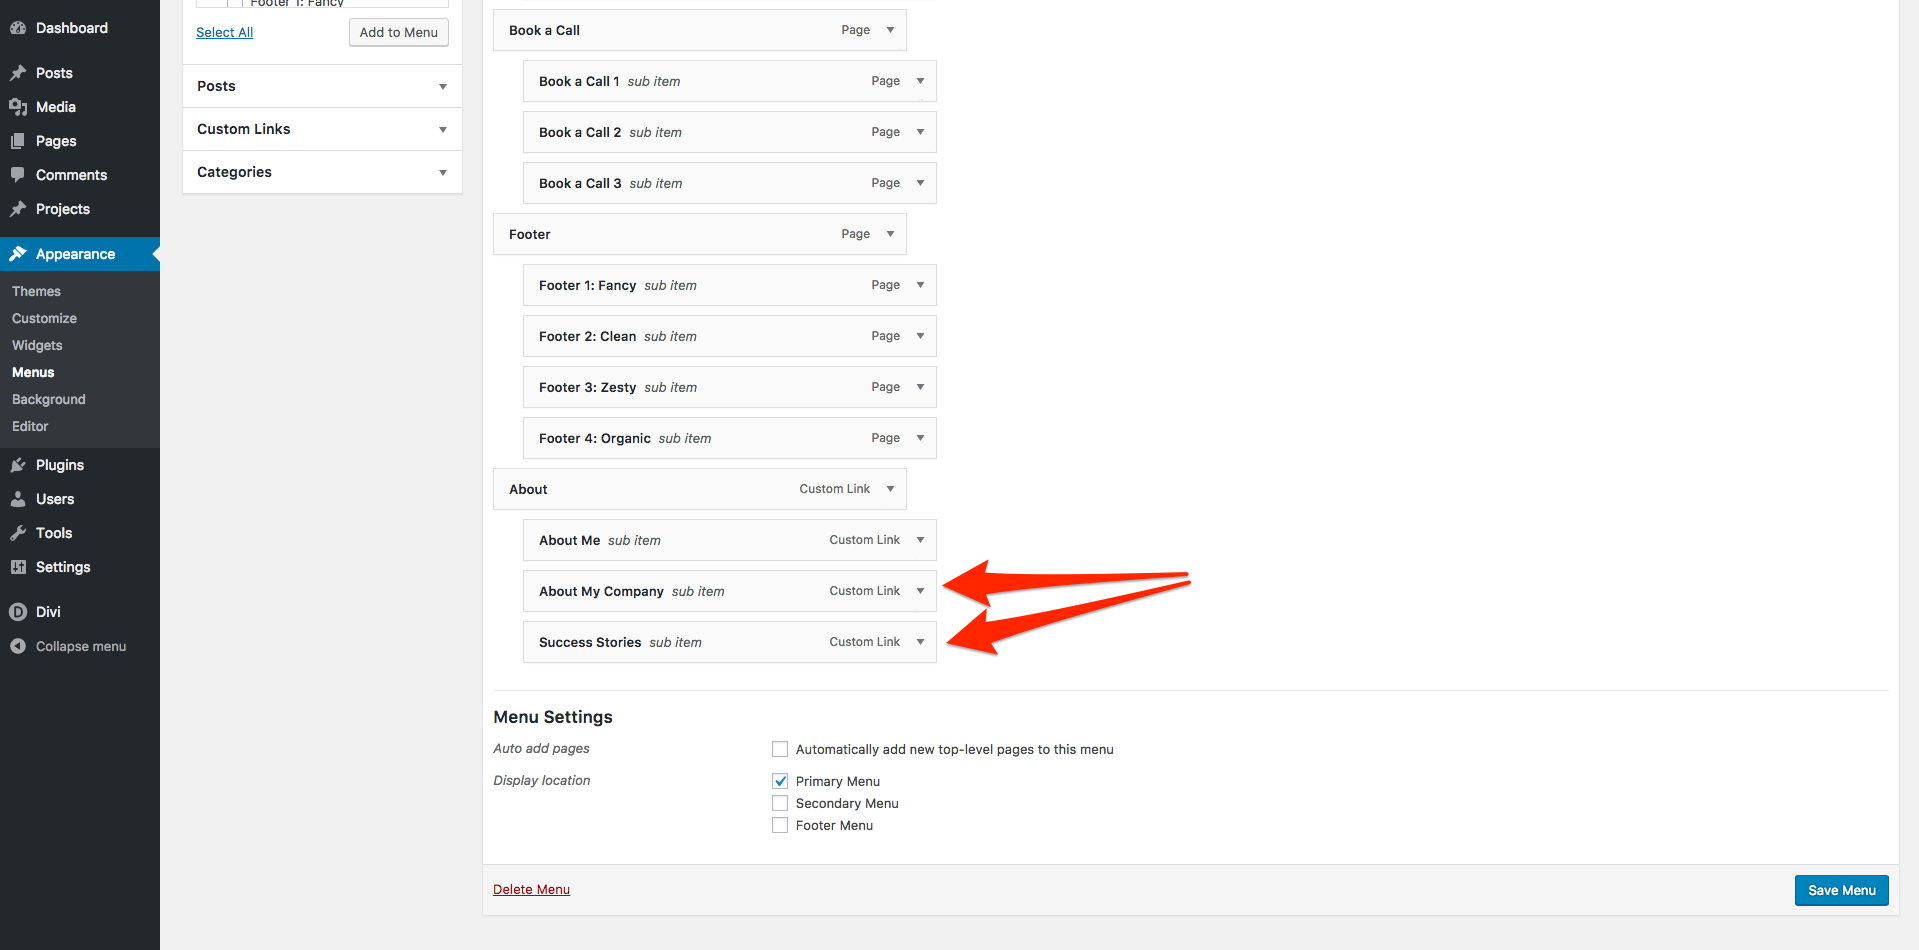
Step 3: Repeat the click and drag process with all of the menu items we want to nest.
Step 4: You should now have your menu items nested below the main menu item. Click on ‘Save Menu’ to save your changes.
Now, when you view your website you will see that we have the main menu item, and the other items which we nested below it are now displayed in a drop down menu when we hover over.
How to remove menu items from drop down menus
The steps you will need to take for the final part in our Menus tutorial depends on what you would like to achieve. If you want to remove a menu item from your drop down menu entirely (you don’t want it in your menu at all) then simply follow the steps outlined in the ‘How to remove a menu item’ above. However, if you would like to keep the menu item but just remove it from your drop down menu, read on…Step 1: Locate the menu item you’d like to remove from your drop down menu.
Step 2: Click and drag the menu item you want to remove, dragging it away from the other nested items. This will then remove the menu item from the drop down menu.
Note: Ensure that wherever you put your menu item that it does not indent, otherwise it will still be in a dropdown menu.
In this example the menu item we removed has no indent and will display as it’s own link in our menu:
However, in this example I have accidentally nested the menu item inside another drop down menu:
Step 3: Click the ‘Save Menu’ button to save your changes.
”
You want to change the world.
We want to help you do it.
The Good Alliance